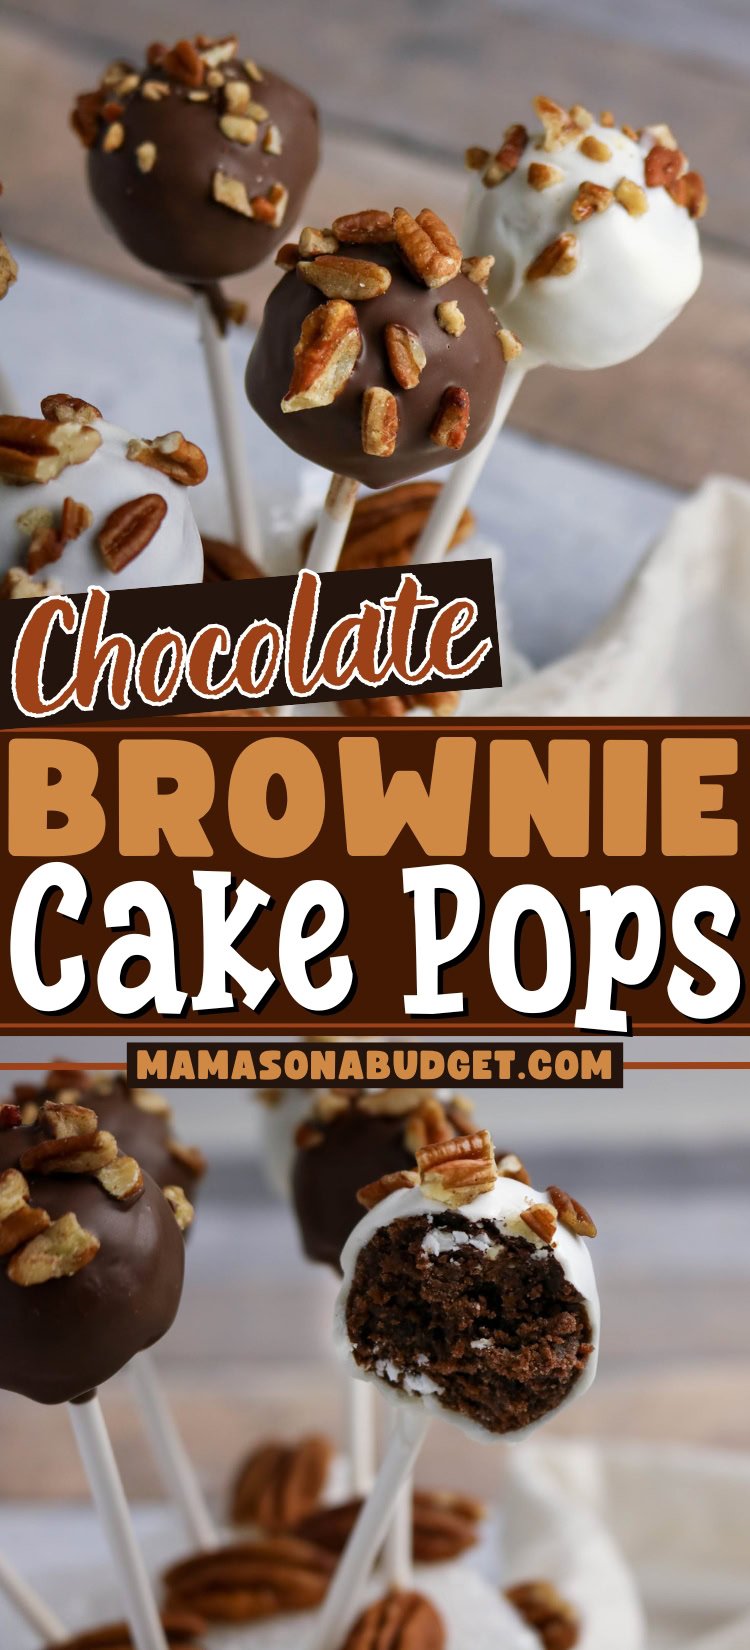
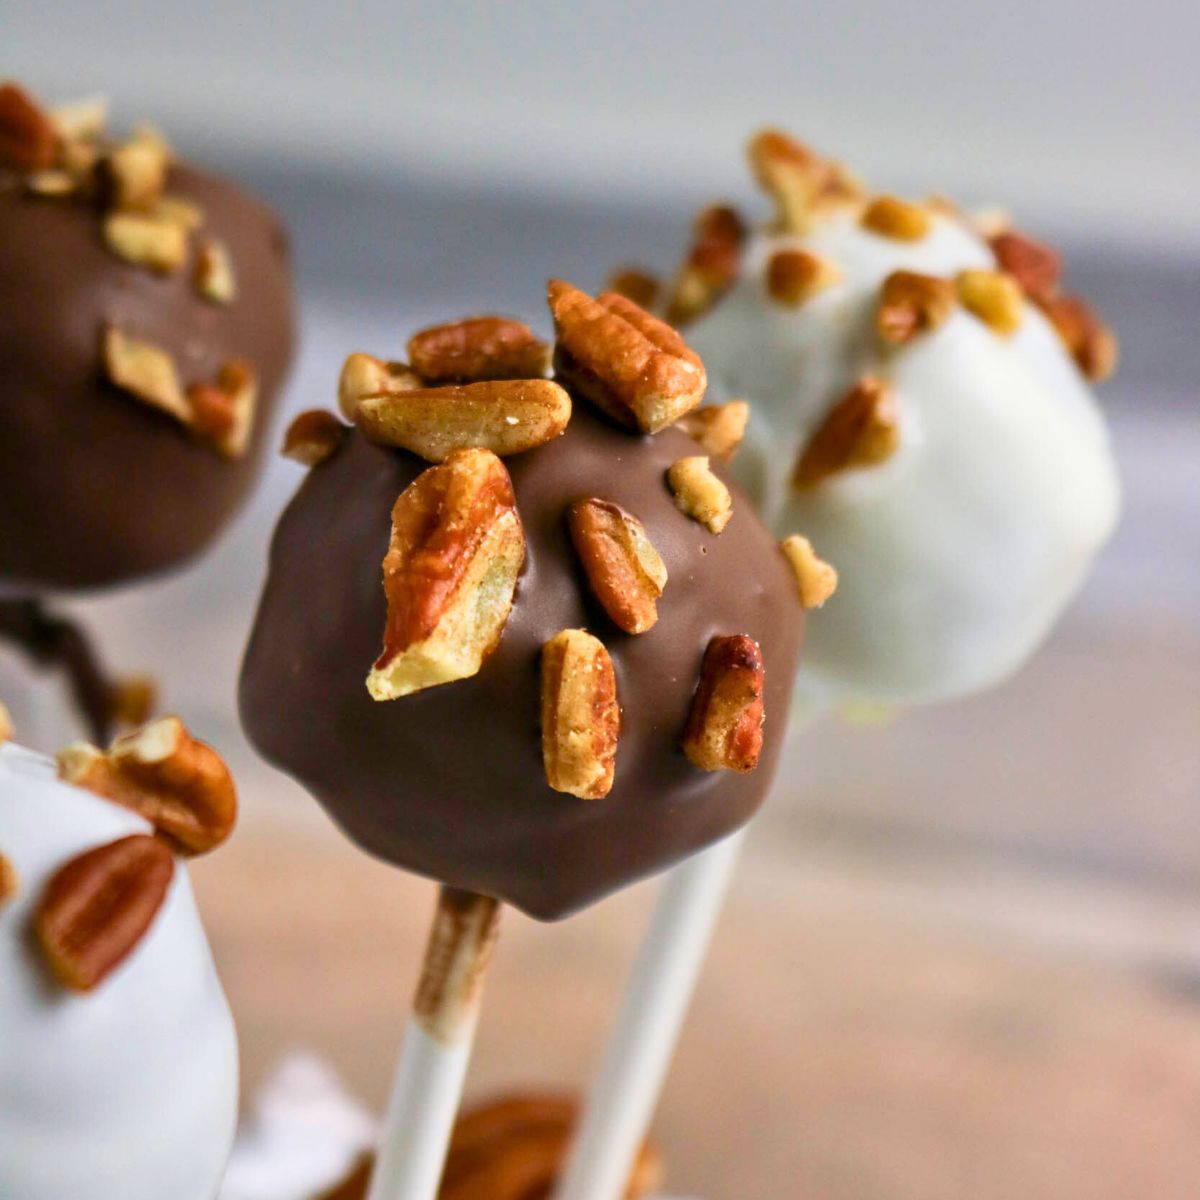
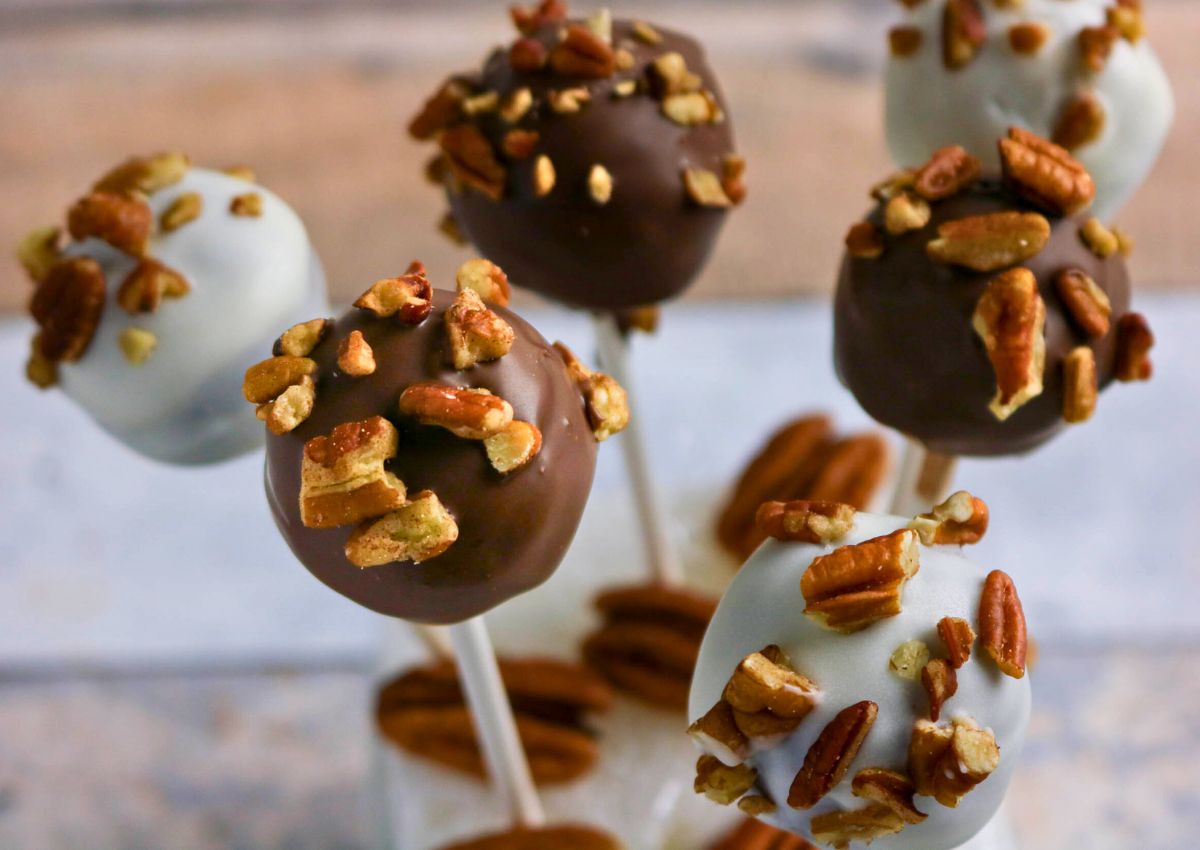
Chocolate Brownie Cake Pops
If you’re looking for a fun and festive treat, these Chocolate Brownie Cake Pops are the answer. Whether you’re planning a party, looking for an edible gift idea, or just craving something sweet and bite-sized, these little pops are incredibly easy to make and even easier to eat!
Would you like to save this?
We first whipped these up for a birthday party and they were a huge hit. The best part? You can use a box mix or homemade brownies, so it’s flexible depending on how much time you have. Once you get the hang of rolling and dipping, you’ll want to make them for every occasion.
Love easy dessert recipes like this one? Check out our Twix Bites, Strawberry Truffles, or these Funfetti Oreo Truffles for more sweet inspiration.
Why You’ll Love This Recipe
- Bite-sized and party-perfect: Ideal for entertaining or gifting.
- Kid-friendly and fun to make: Great for little helpers in the kitchen.
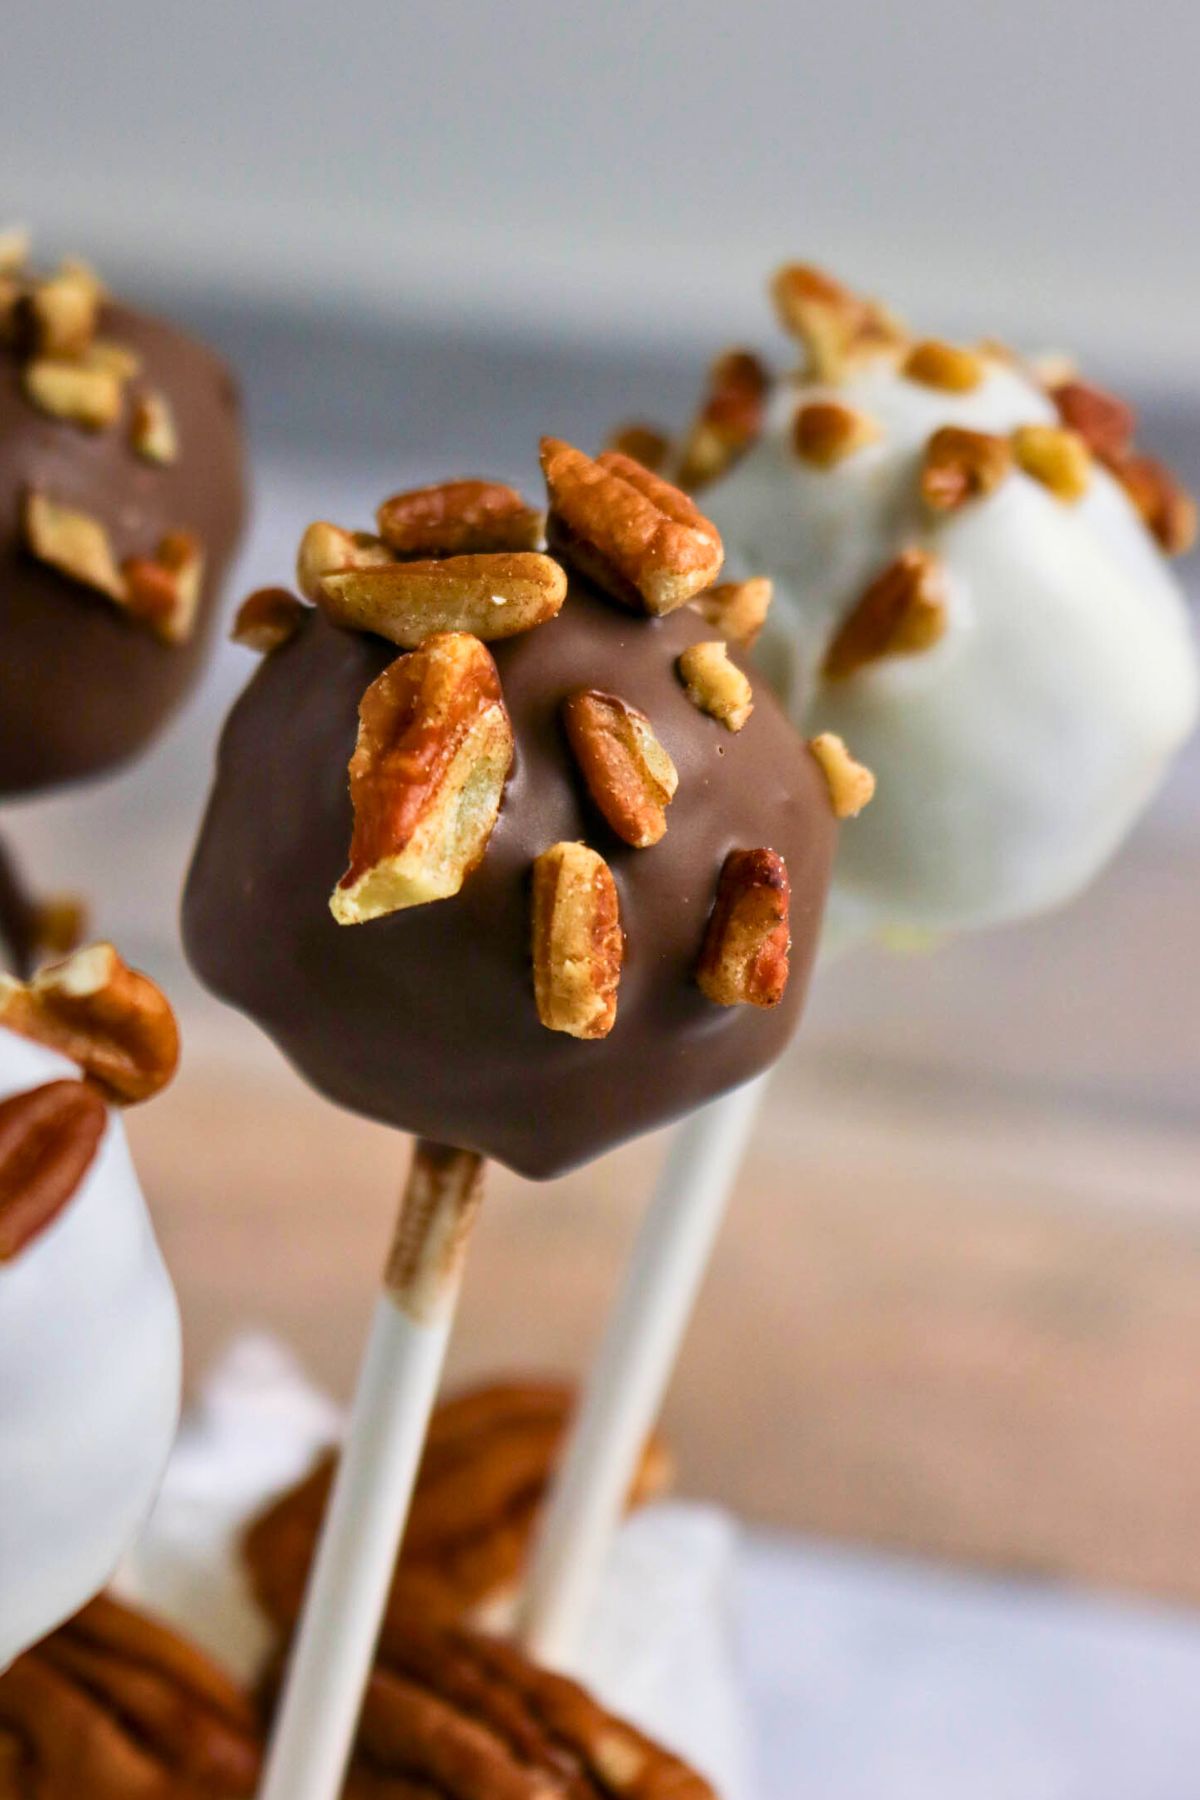
- Customizable toppings: Sprinkles, nuts, drizzle—go wild!
- Use leftovers creatively: A smart way to repurpose brownies.
Ingredients
Chocolate Brownies Cake Pops
Equipment
- Lollipop sticks
- Baking sheet with parchment
- Mixing Bowl
- Small microwave-safe bowl for melting chocolate
- cookie scope – optional
Ingredients
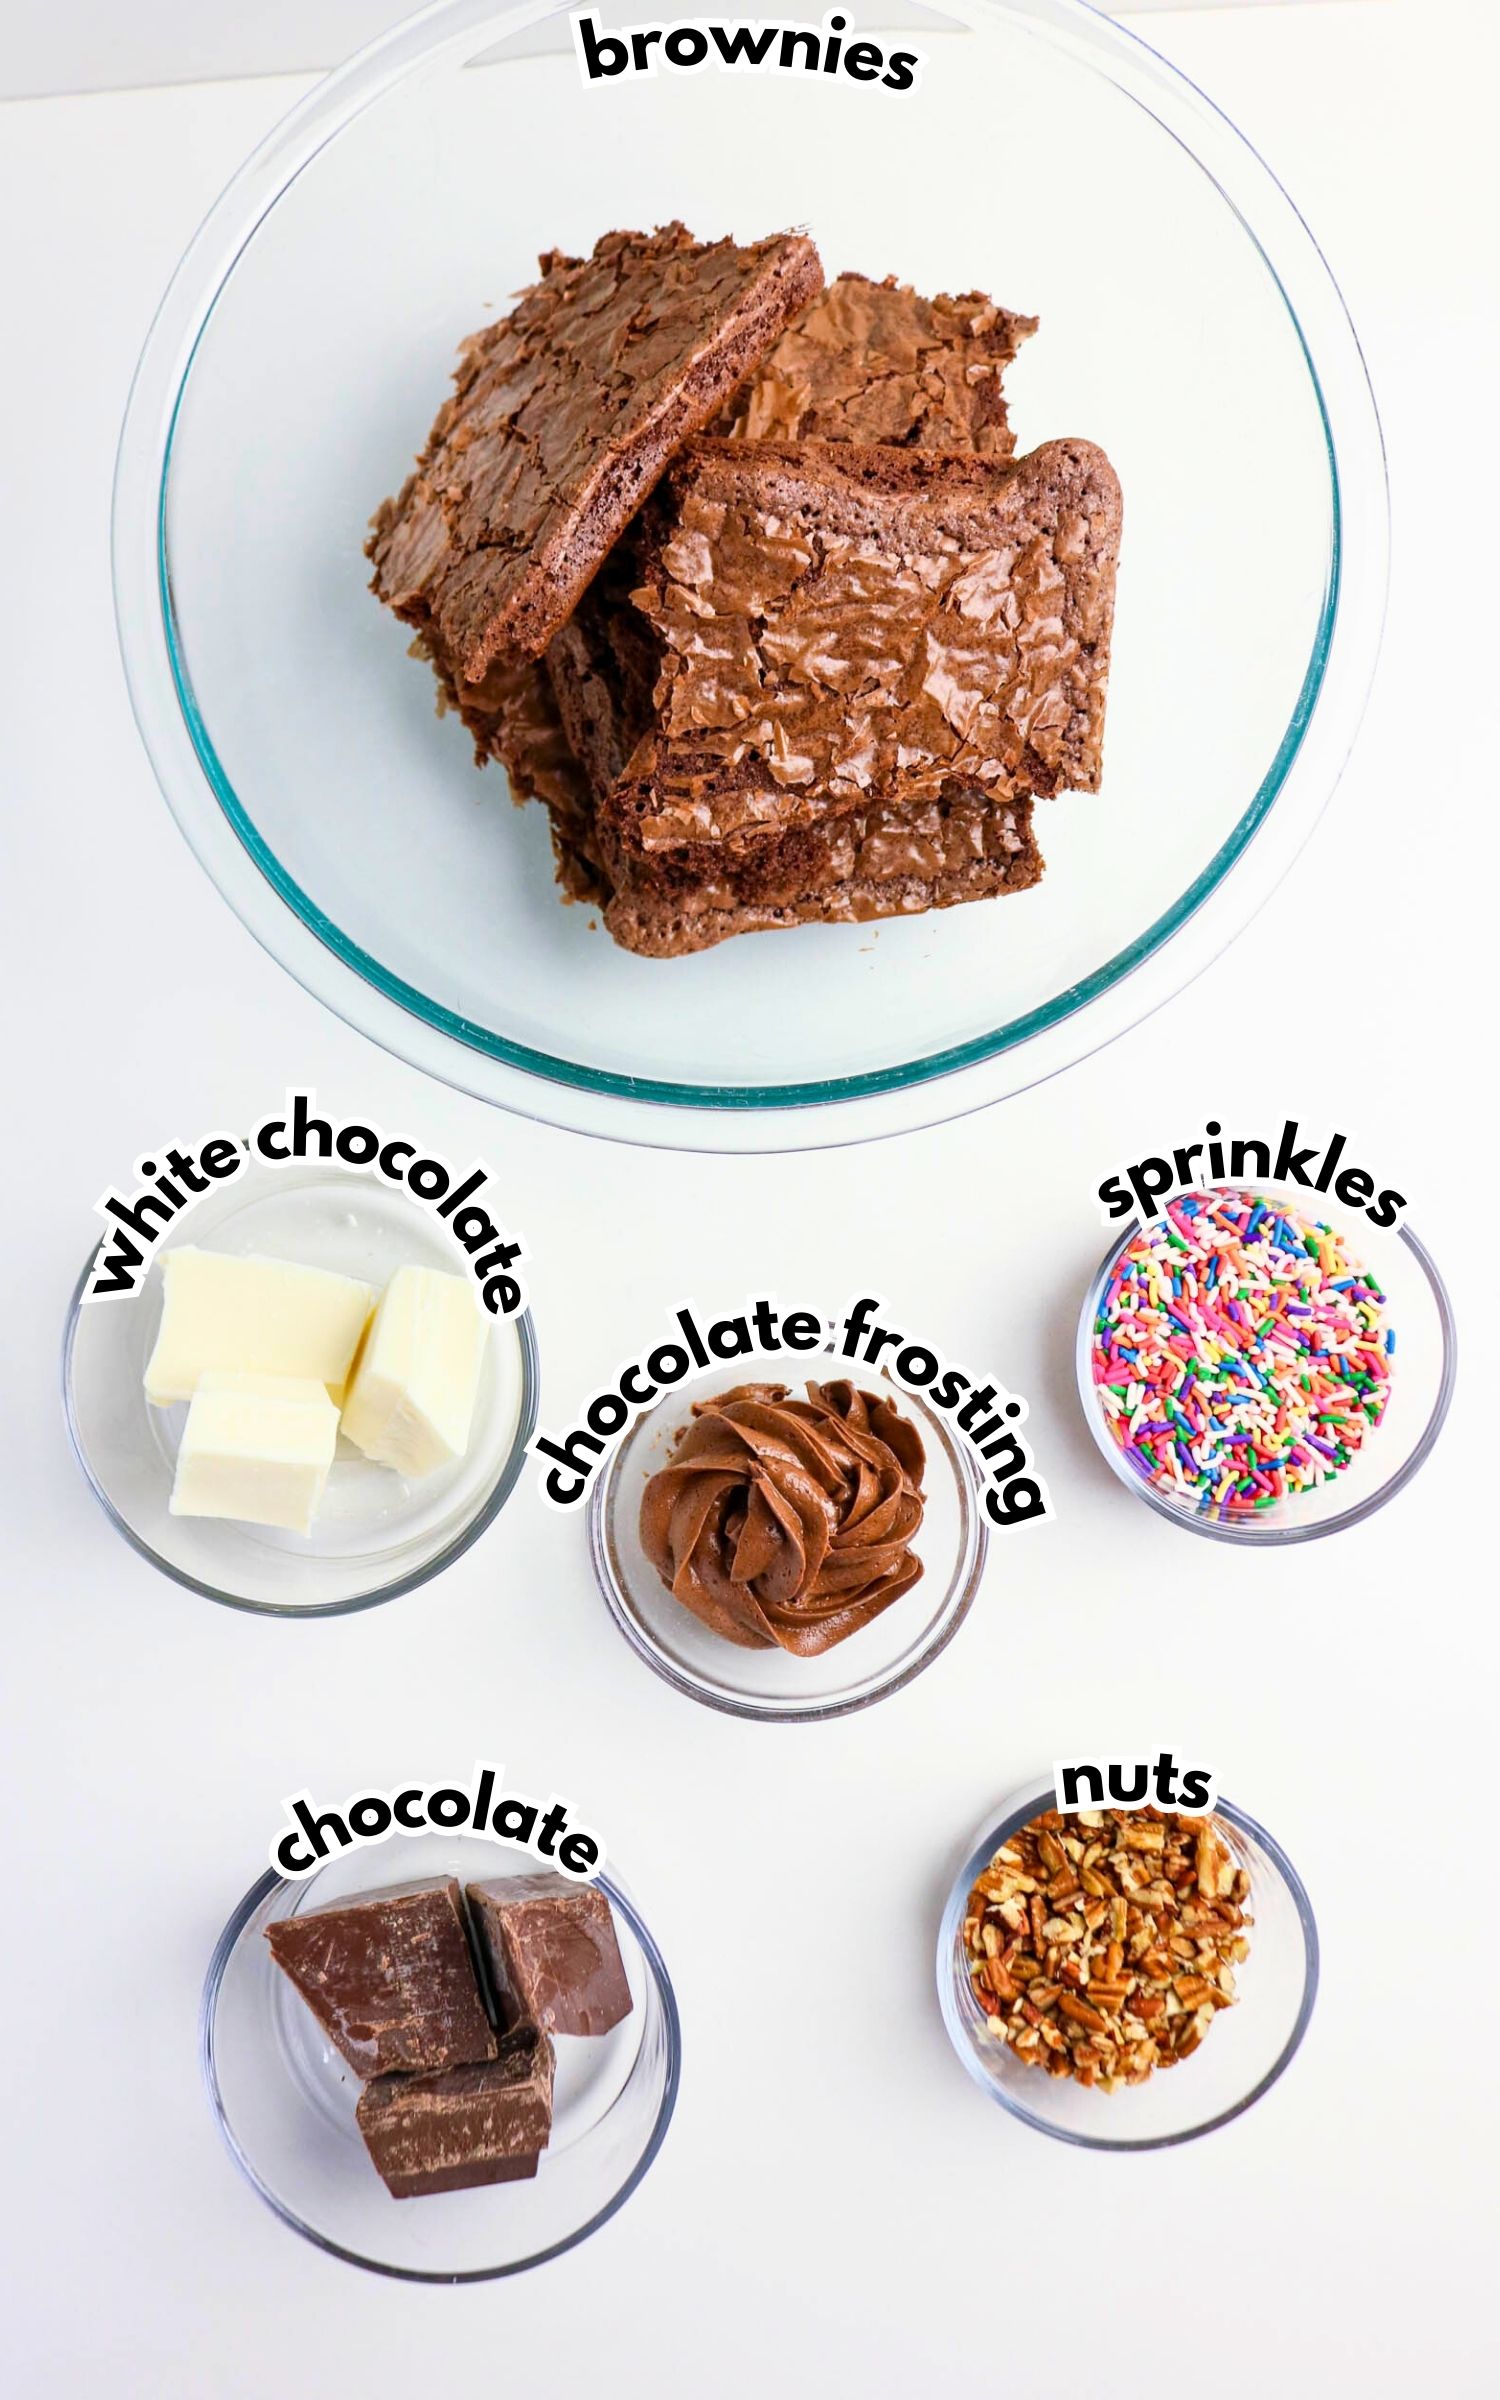
- 15.25 ounces brownie mix plus ingredients listed on the package or 1 pan of homemade brownies
- 3 –4 tablespoons chocolate frosting
- 12 ounces white or chocolate candy melts or baking chocolate
- Sprinkles or chopped nuts optional
Instructions
- Bake the brownies according to package or recipe directions. Let them cool completely.
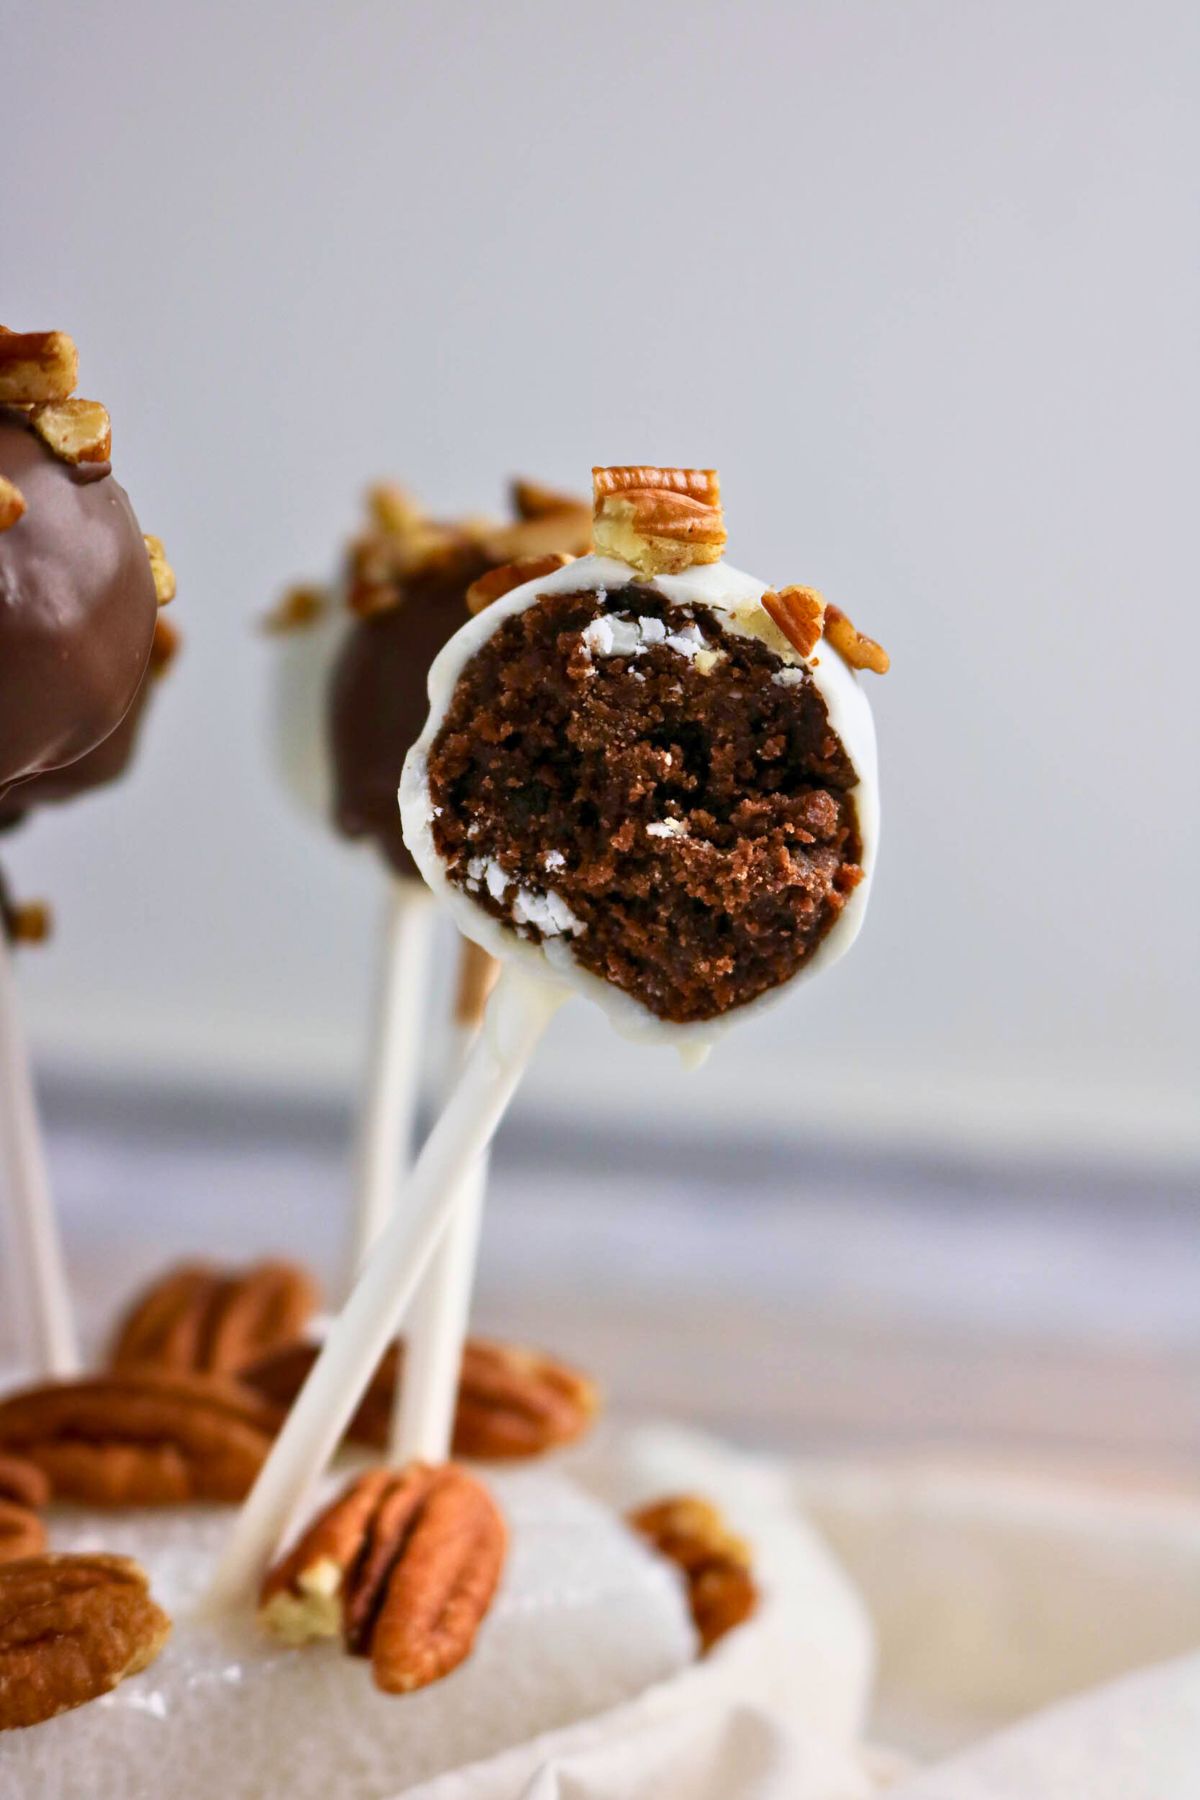
- Crumble the cooled brownies into a large bowl, breaking them into fine crumbs.
- Add 3 tablespoons of frosting and mix until the mixture holds together when pressed. If needed, add an extra tablespoon.
- Roll the mixture into 1-inch balls and place them on a parchment-lined baking sheet. Freeze for 15 minutes.
- Melt a small amount of the chocolate. Dip the tip of each lollipop stick into the melted chocolate and insert it halfway into each brownie ball. Chill for 5 more minutes to set.
- Melt the remaining chocolate until smooth. Dip each cake pop into the chocolate, letting the excess drip off.
- Add sprinkles or nuts if using, then stand the cake pops upright in a foam block or lay them on parchment to set.
- Let the chocolate harden completely before serving or packaging.
Notes
- Use a cookie scoop for uniform cake pops.
- Chill brownie balls before and after adding sticks.
- Gently tap to remove excess chocolate.
- Decorate before the coating sets.
Storage
- Storage: Store in an airtight container in the fridge for up to 5 days.
Freezing: Freeze undecorated pops up to 1 month. Thaw and dip when ready.
Disclaimer:
Any nutritional data I provide is an approximation and actual dietary information can vary based on ingredients and proportion sizes.
Nutrition
Wendy’s Tips
- Use a cookie scoop for evenly sized pops.
- Chill well to prevent pops from falling off the sticks.
- Work in batches to keep uncoated pops firm.
- Tap off excess chocolate gently to avoid drips.
FAQ
Do you have questions about this recipe? Here are the answers to the most commonly asked questions.
Yes! These can be made up to 3 days ahead and stored in the fridge.
A little frosting helps bind the mixture. Without it, the pops might not hold together well.
You can use baking chocolate or chocolate chips, melted with a bit of coconut oil.
More Brownie Recipes You May Love