


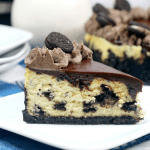
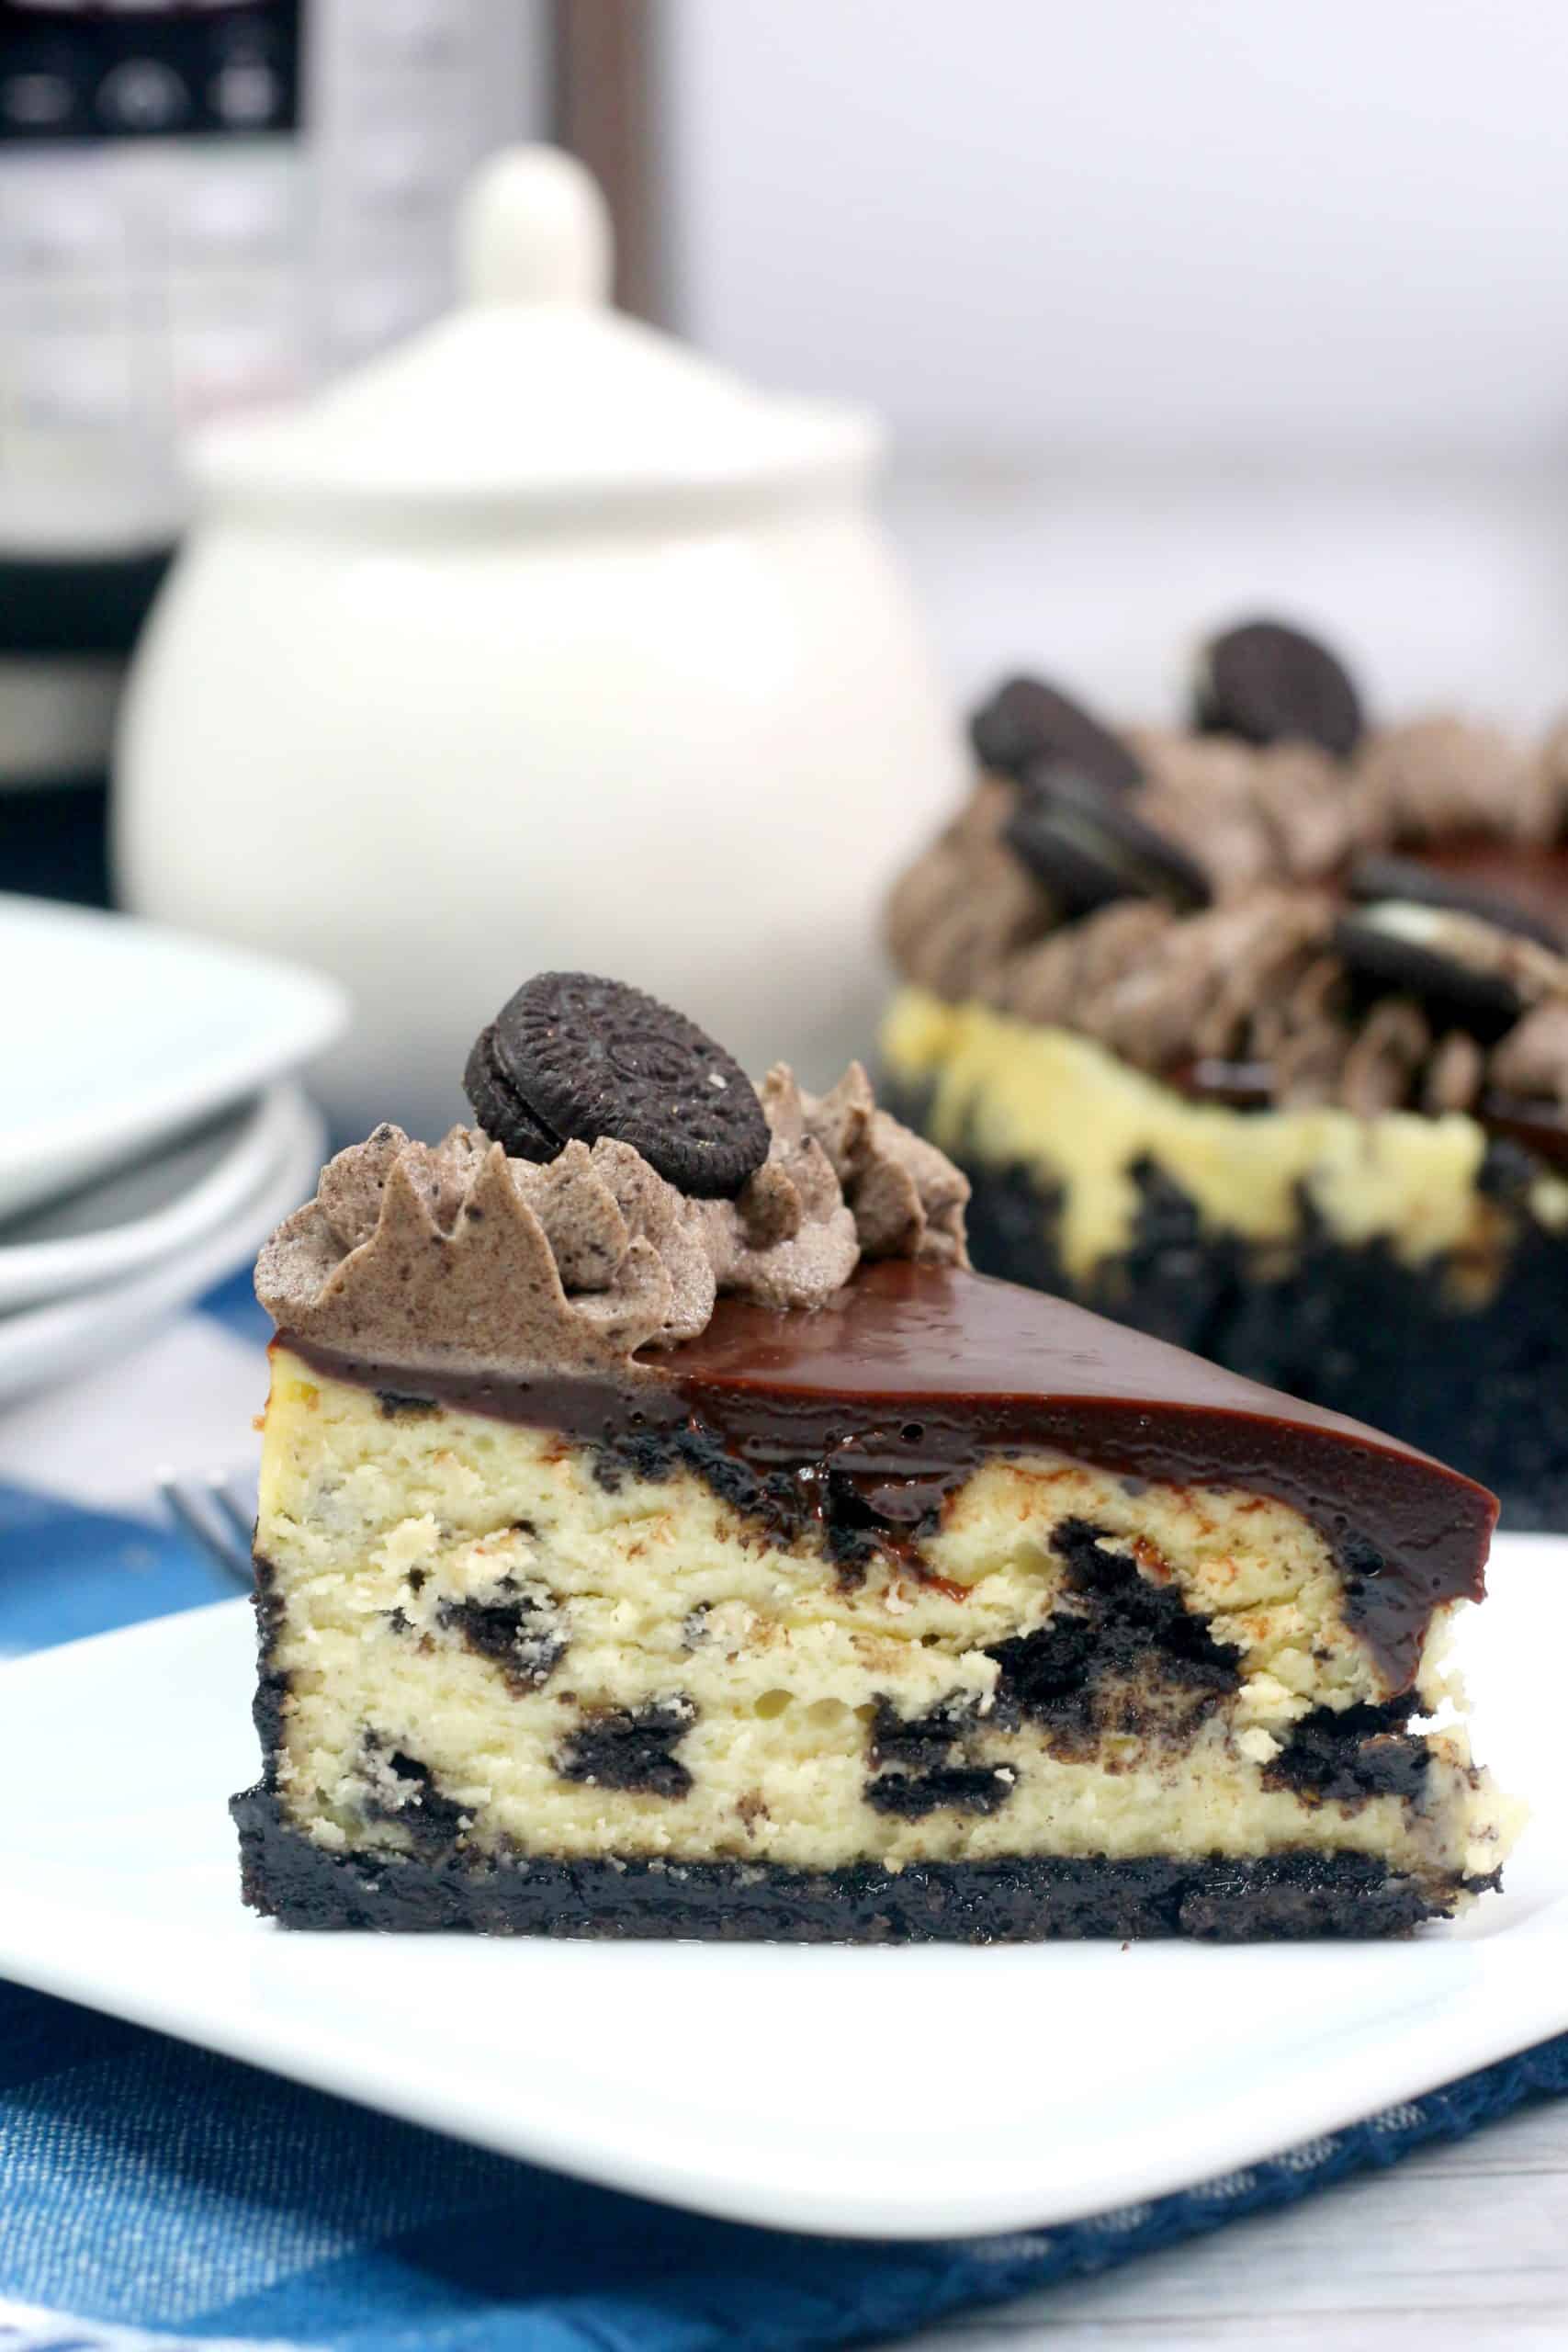
Oreo Dream Cheesecake is a rich and creamy Oreo filled dessert that you can never go wrong with. It’s perfect for any party or occasion.

My daughter loves Oreo’s. They are one of her top rated treats. She enjoys anything Oreo flavored from cakes, cheesecakes, cupcakes, cookies, and even pudding. Cheesecake is another one of her top desserts so I decided to use my creative side. I came up with this amazingly creamy Oreo Dream Cheesecake.
What is Oreo Dream Cheesecake?
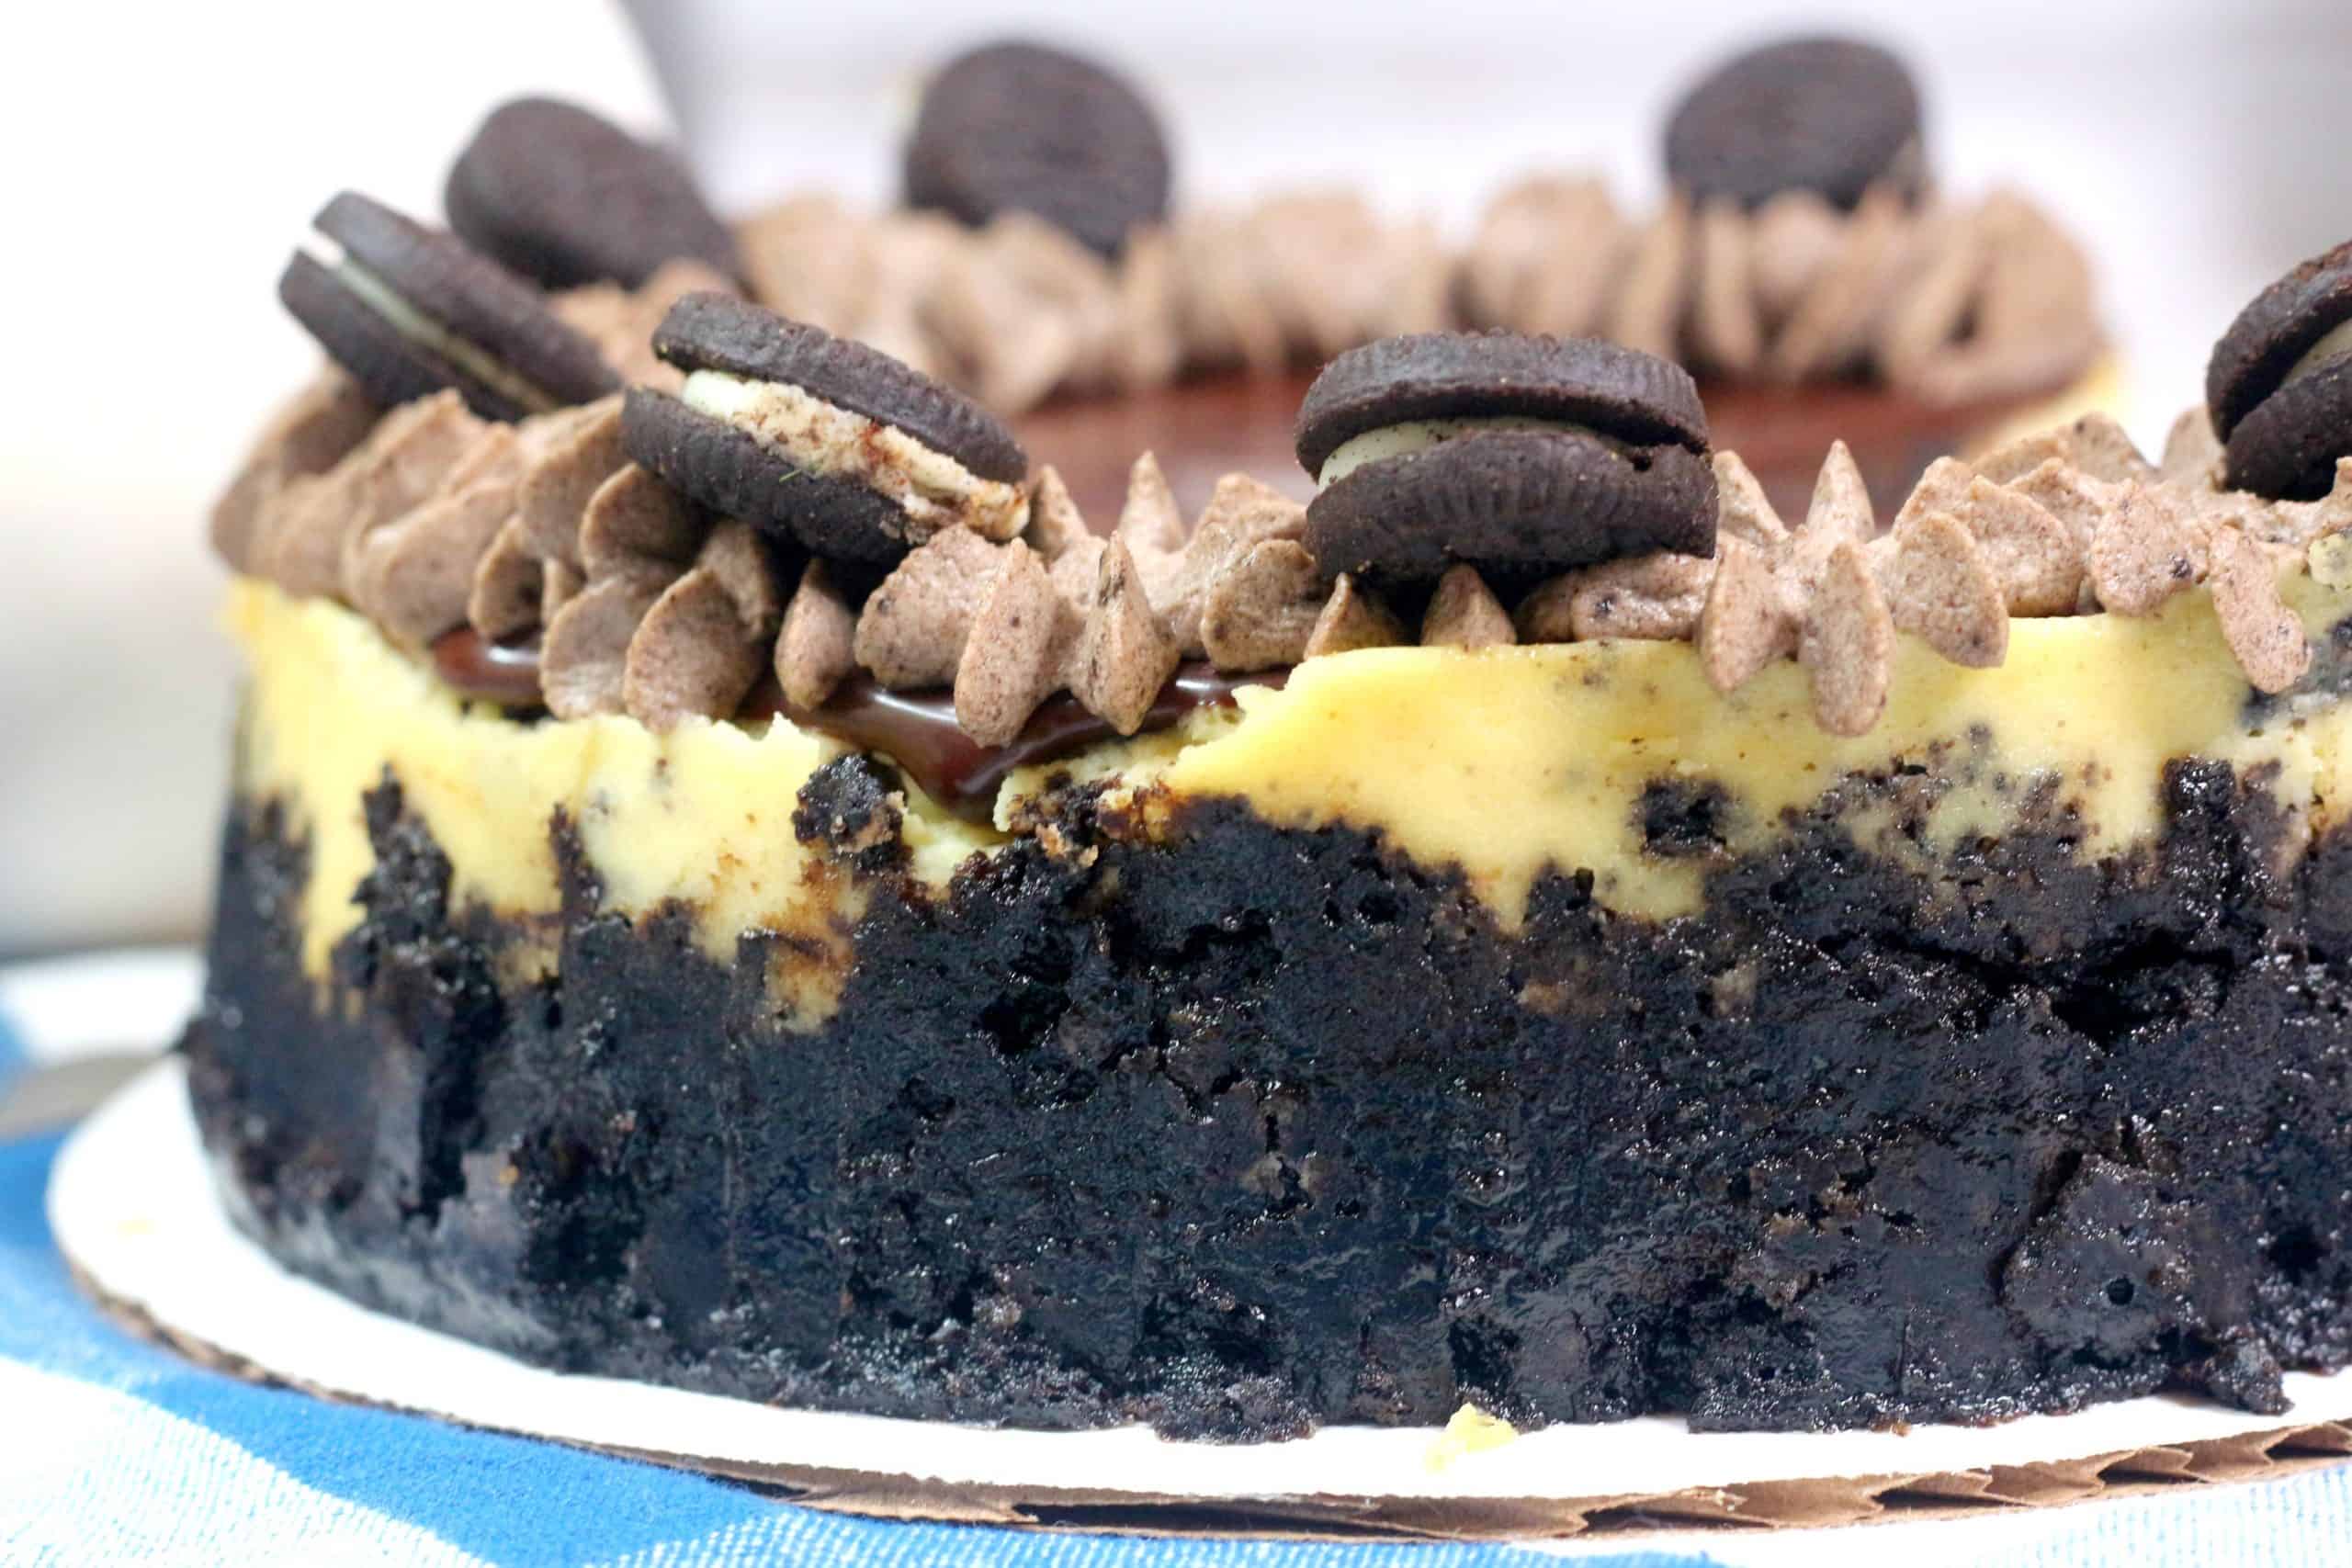
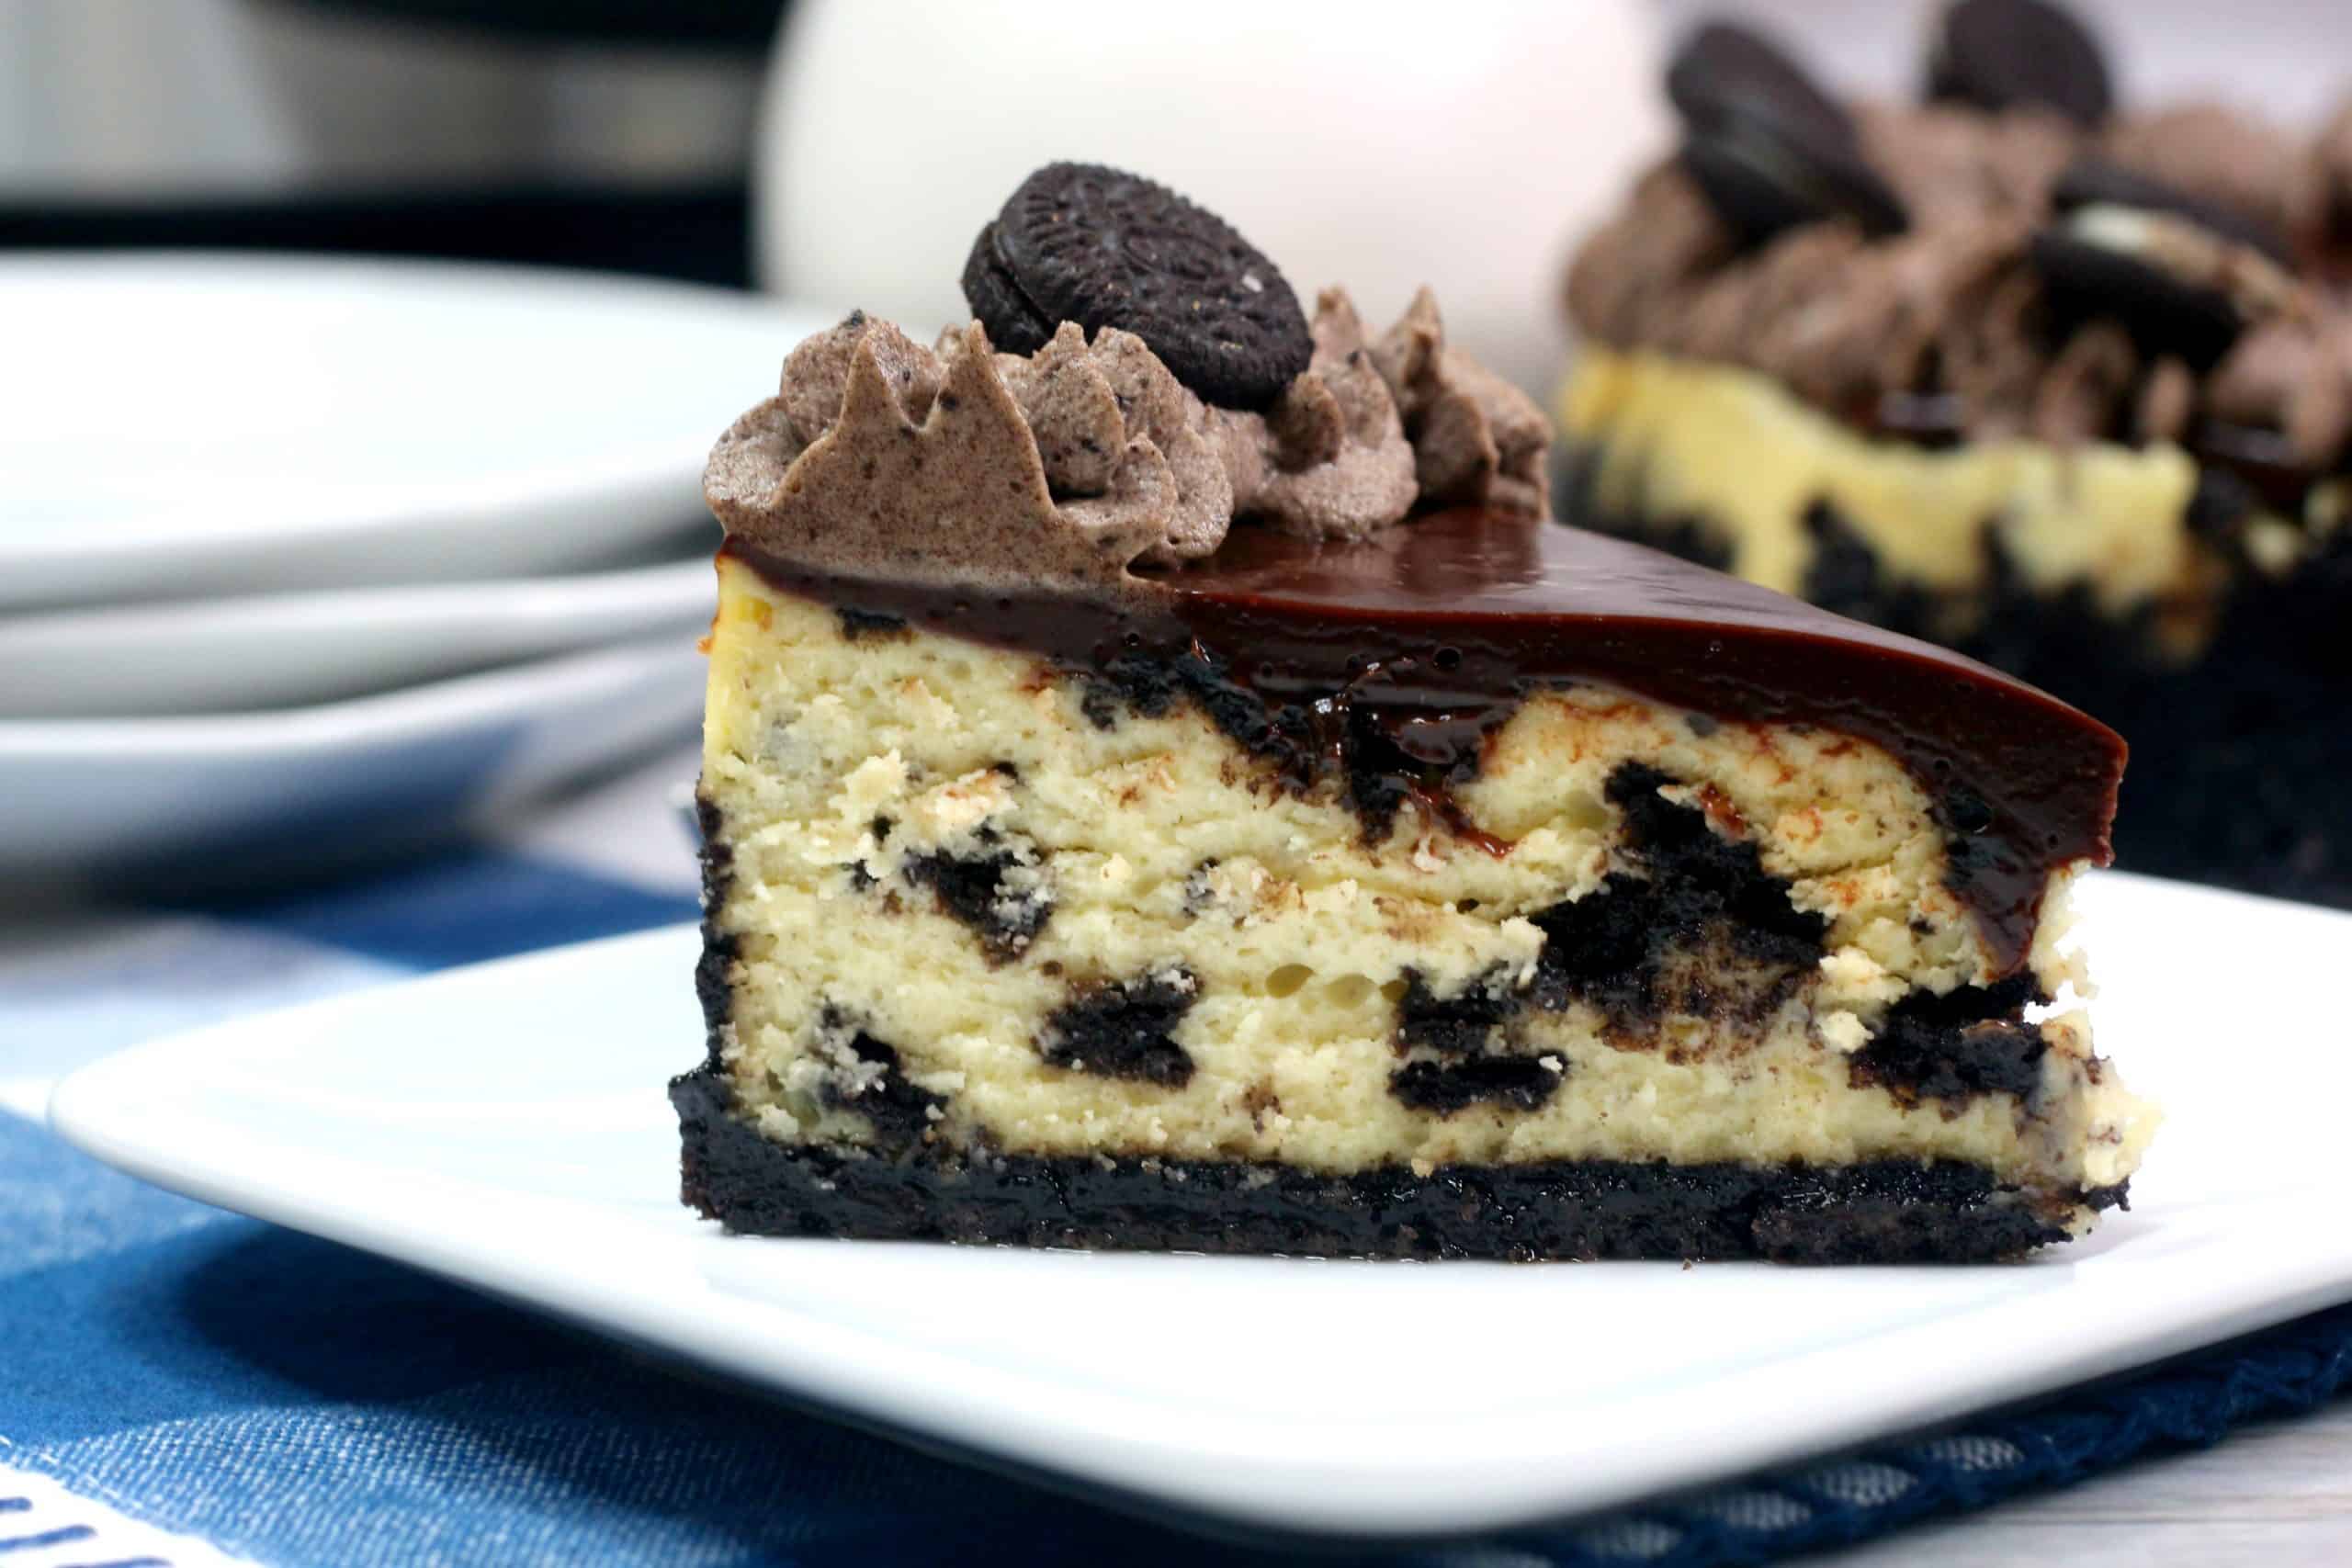
Oreo Dream Cheesecake is a layer of crushed oreo cookies turned into a crust, then a layer a creamy cheesecake layer filled with oreo cookies. Then I topped the cheesecake with a rich layer of chocolate ganache, and some smooth oreo whipped cream.

What is Oreo Whipped Cream?
Oreo Whipped Cream is a homemade mixture of heavy whipping cream, powdered sugar, and crushed oreos. It’s a light and fluffy sweet topping to use for decorating this Oreo Dream Cheesecake. Once you make Oreo whipped cream you will never want another kind of whipped cream. It’s very flexible and perfect on so many different types of desserts.
Tips for making Oreo Dream Cheesecake
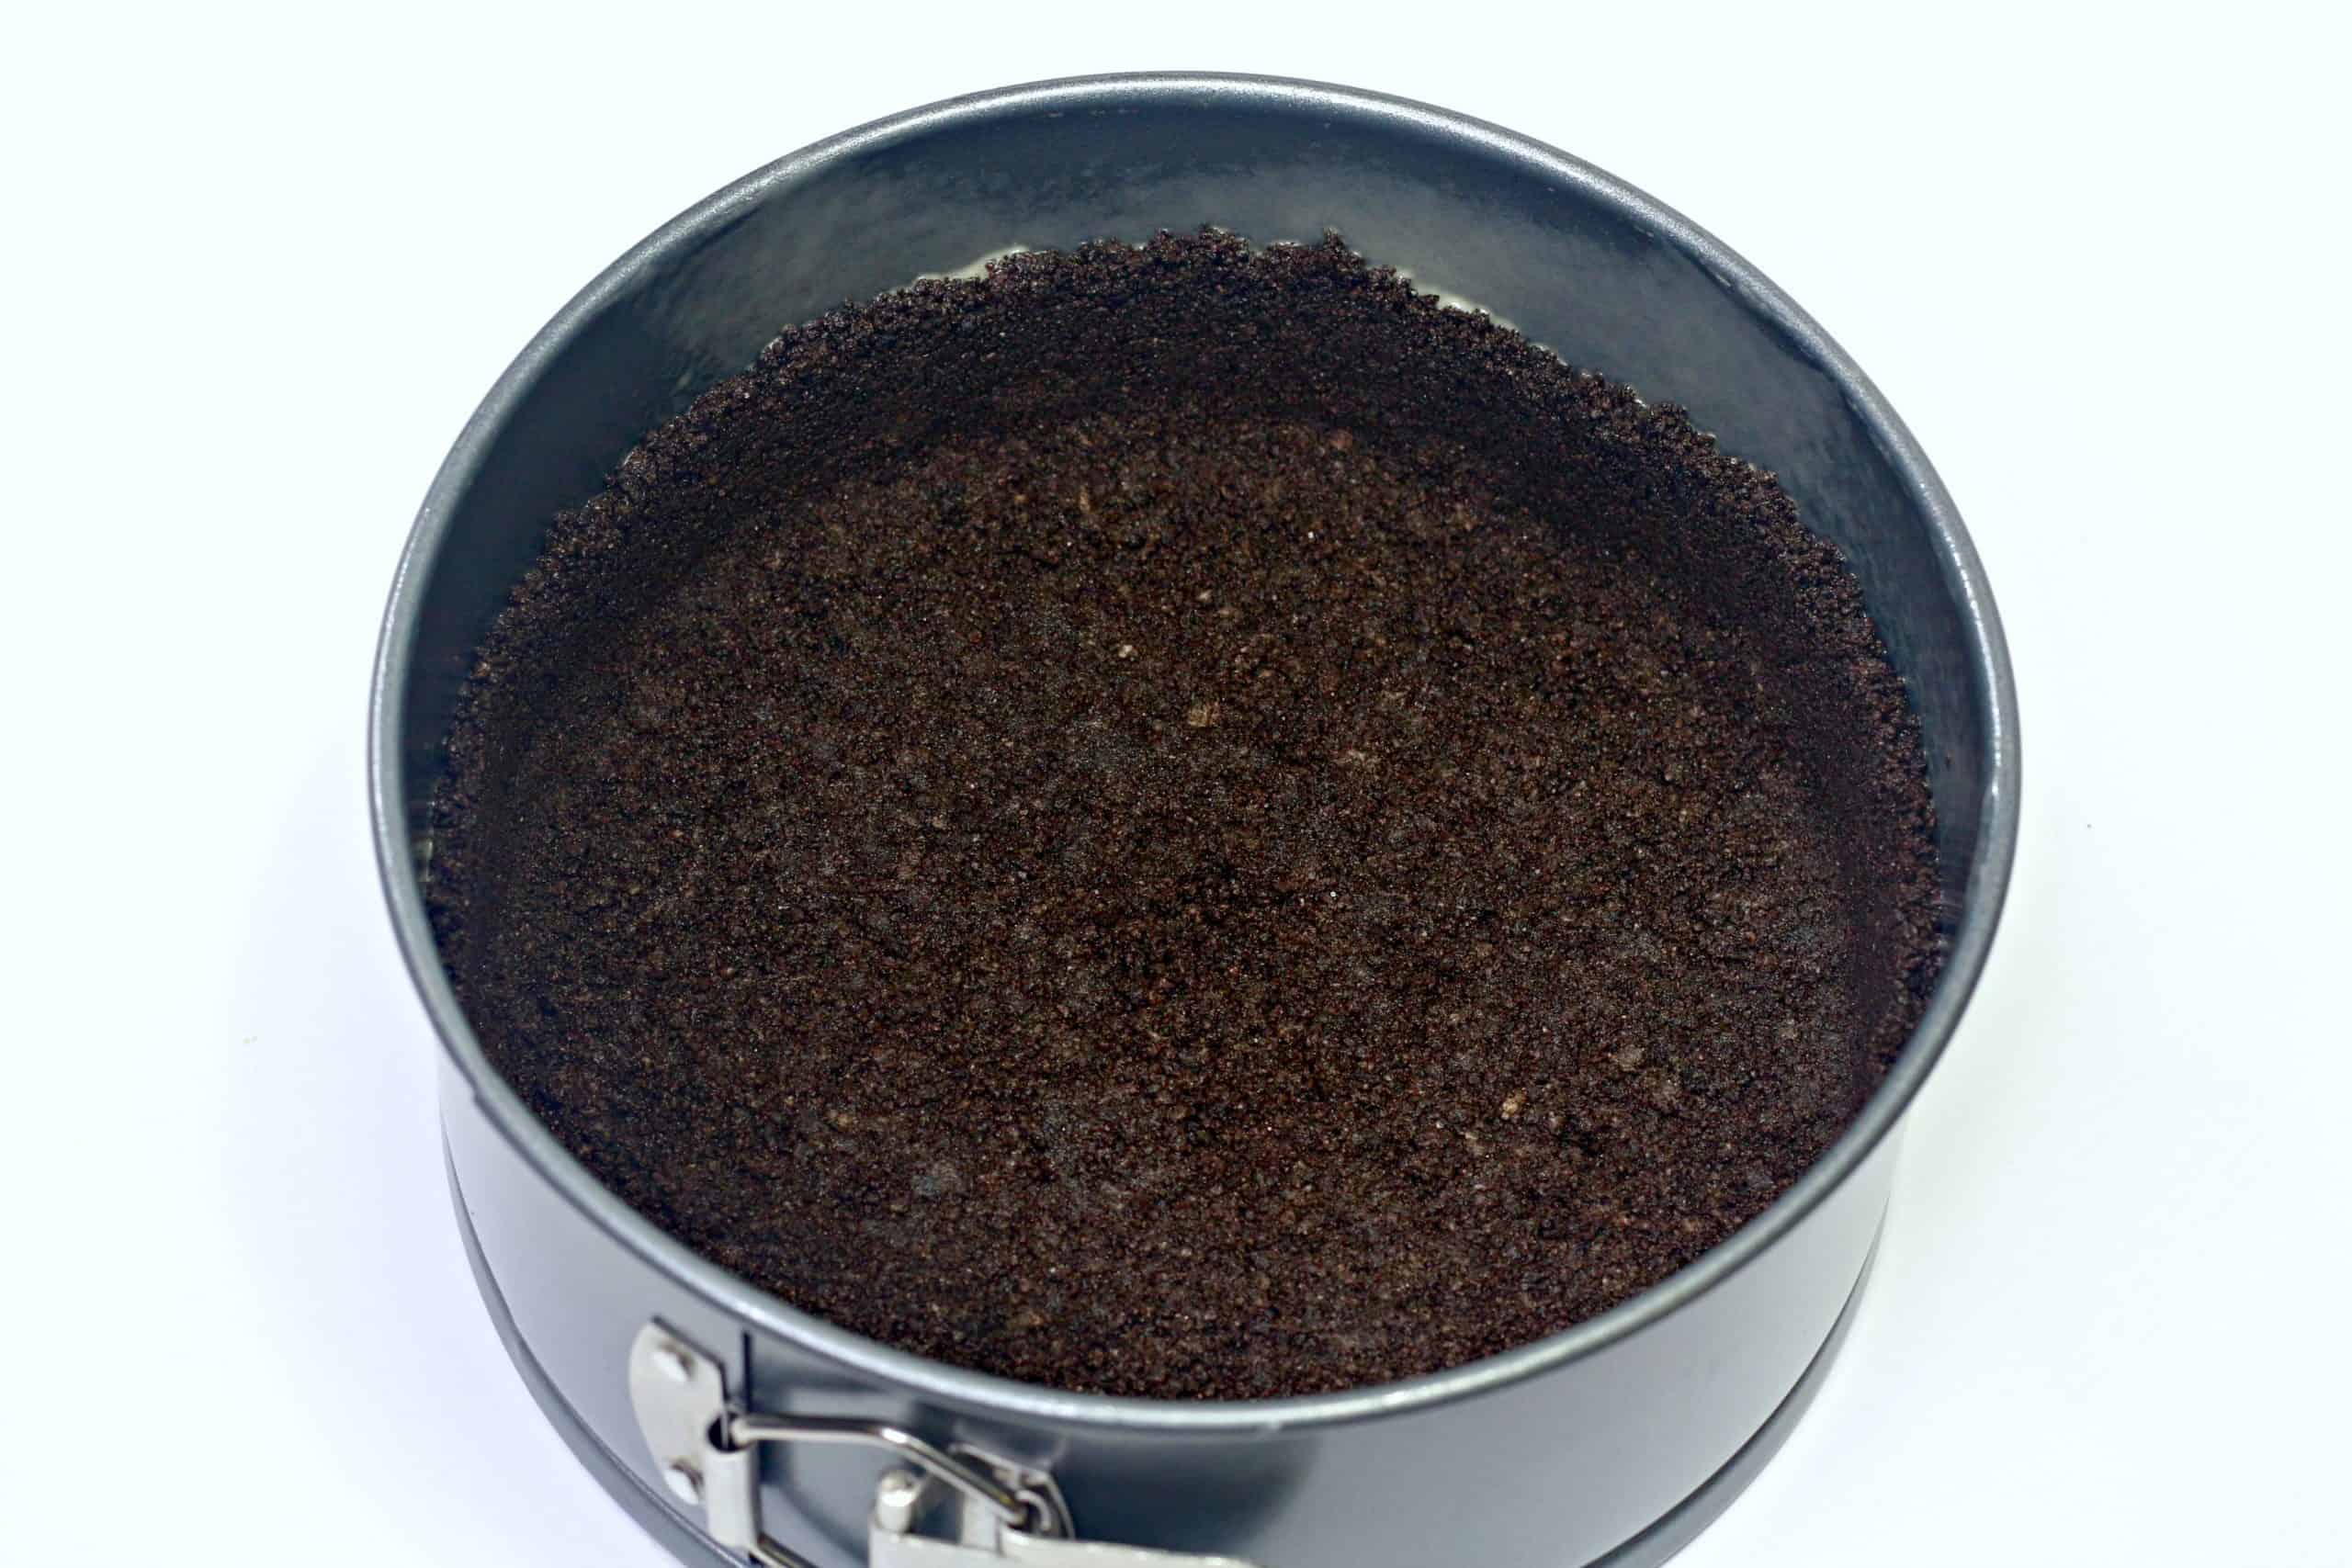
Make sure that you spray your Springform pan well before pressing your crust into your pan. Using a springform pan is very important for making a cheesecake as you cannot turn your cheesecake upside down to get it out of a regular pan.
I strongly advise that you ensure that you get your crust nicely chilled before you place your cheesecake layer for the Oreo Dream Cheesecake on top of the crust. I always make sure that I leave my crust in my fridge for at least 20 minutes. Sometimes I get busy and leave the crust in for longer.
It is very important with making a cheesecake that you allow all your cold ingredients to come to room temperature. You want to make sure that your eggs, heavy cream, and cream cheese are room temperature before mixing them together to form your batter.
I use an electric hand mixer instead of a large stand mixer, but you can use either one. I just hate dragging my heavy stand mixer out of the cabinet so I avoid it as much as possible. You will want to beat your mixture until it is light and fluffy.
Don’t not beat the cookies when you add them in. You will want to slow stir or fold them into your mixture. Try to avoid crushing them even more.
Your cheesecake can stay in your fridge for up to a week. You can also freezer your cheesecake if you do not eat it all. And, then to thaw just place your cheesecake in your fridge overnight.
Related Recipes
Chocolate Raspberry Cheesecake

Oreo Dream Cheesecake
Equipment
- Instant Pot or Pressure Cooker
- disposable piping bag with star tip
Ingredients
Crust Ingredients
- 15 Oreo cookies crushed
- 3 tablespoon unsalted butter melted
Batter Ingredients
- 2 packages 8 oz each cream cheese (room temp)
- ½ C sugar
- 1 tablespoon cornstarch
- 3 large eggs room temp
- ½ C heavy cream room temp
- 1 teaspoon vanilla
- 10 Oreo cookies chopped
Ganache Ingredients
- ½ C heavy whipping cream
- 1 C chocolate chips
Oreo Whipped Cream Ingredients
- 1 C heavy whipping cream
- ¼ C powdered sugar
- ¼ C crushed oreos
Garnish Ingredients
- 1 C mini oreos
Instructions
Crust Directions
- Prep springform pan with non-stick spray
- Set aside
- Crush cookies
- Combine cookie crumbs and melted butter in a large bowl. Stir until both ingredients are well combined.
- Transfer the mixture to the prepped pan. With a measuring cup press down on the mixture to make a crust. With this crush work to line the sides to about the middle of the pan.
- Move to the refrigerator and chill for at least 20 minutes.
Cheesecake Directions
- Before you start ensure that all of the ingredients are at room temp.
- Using an electric mixer, beat the cream cheese, sugar, and cornstarch on medium-low speed. Continue to beat until the mixture is light and fluffy. Scrape down the sides and bottom of the bowl.
- Reduce the mixer speed to low. Add in the heavy cream. Beat until blended. Scrape the bottom and sides of the bowl. Add one egg at at a time beating after each addition until combined.
- Add the vanilla beating to to mix well.
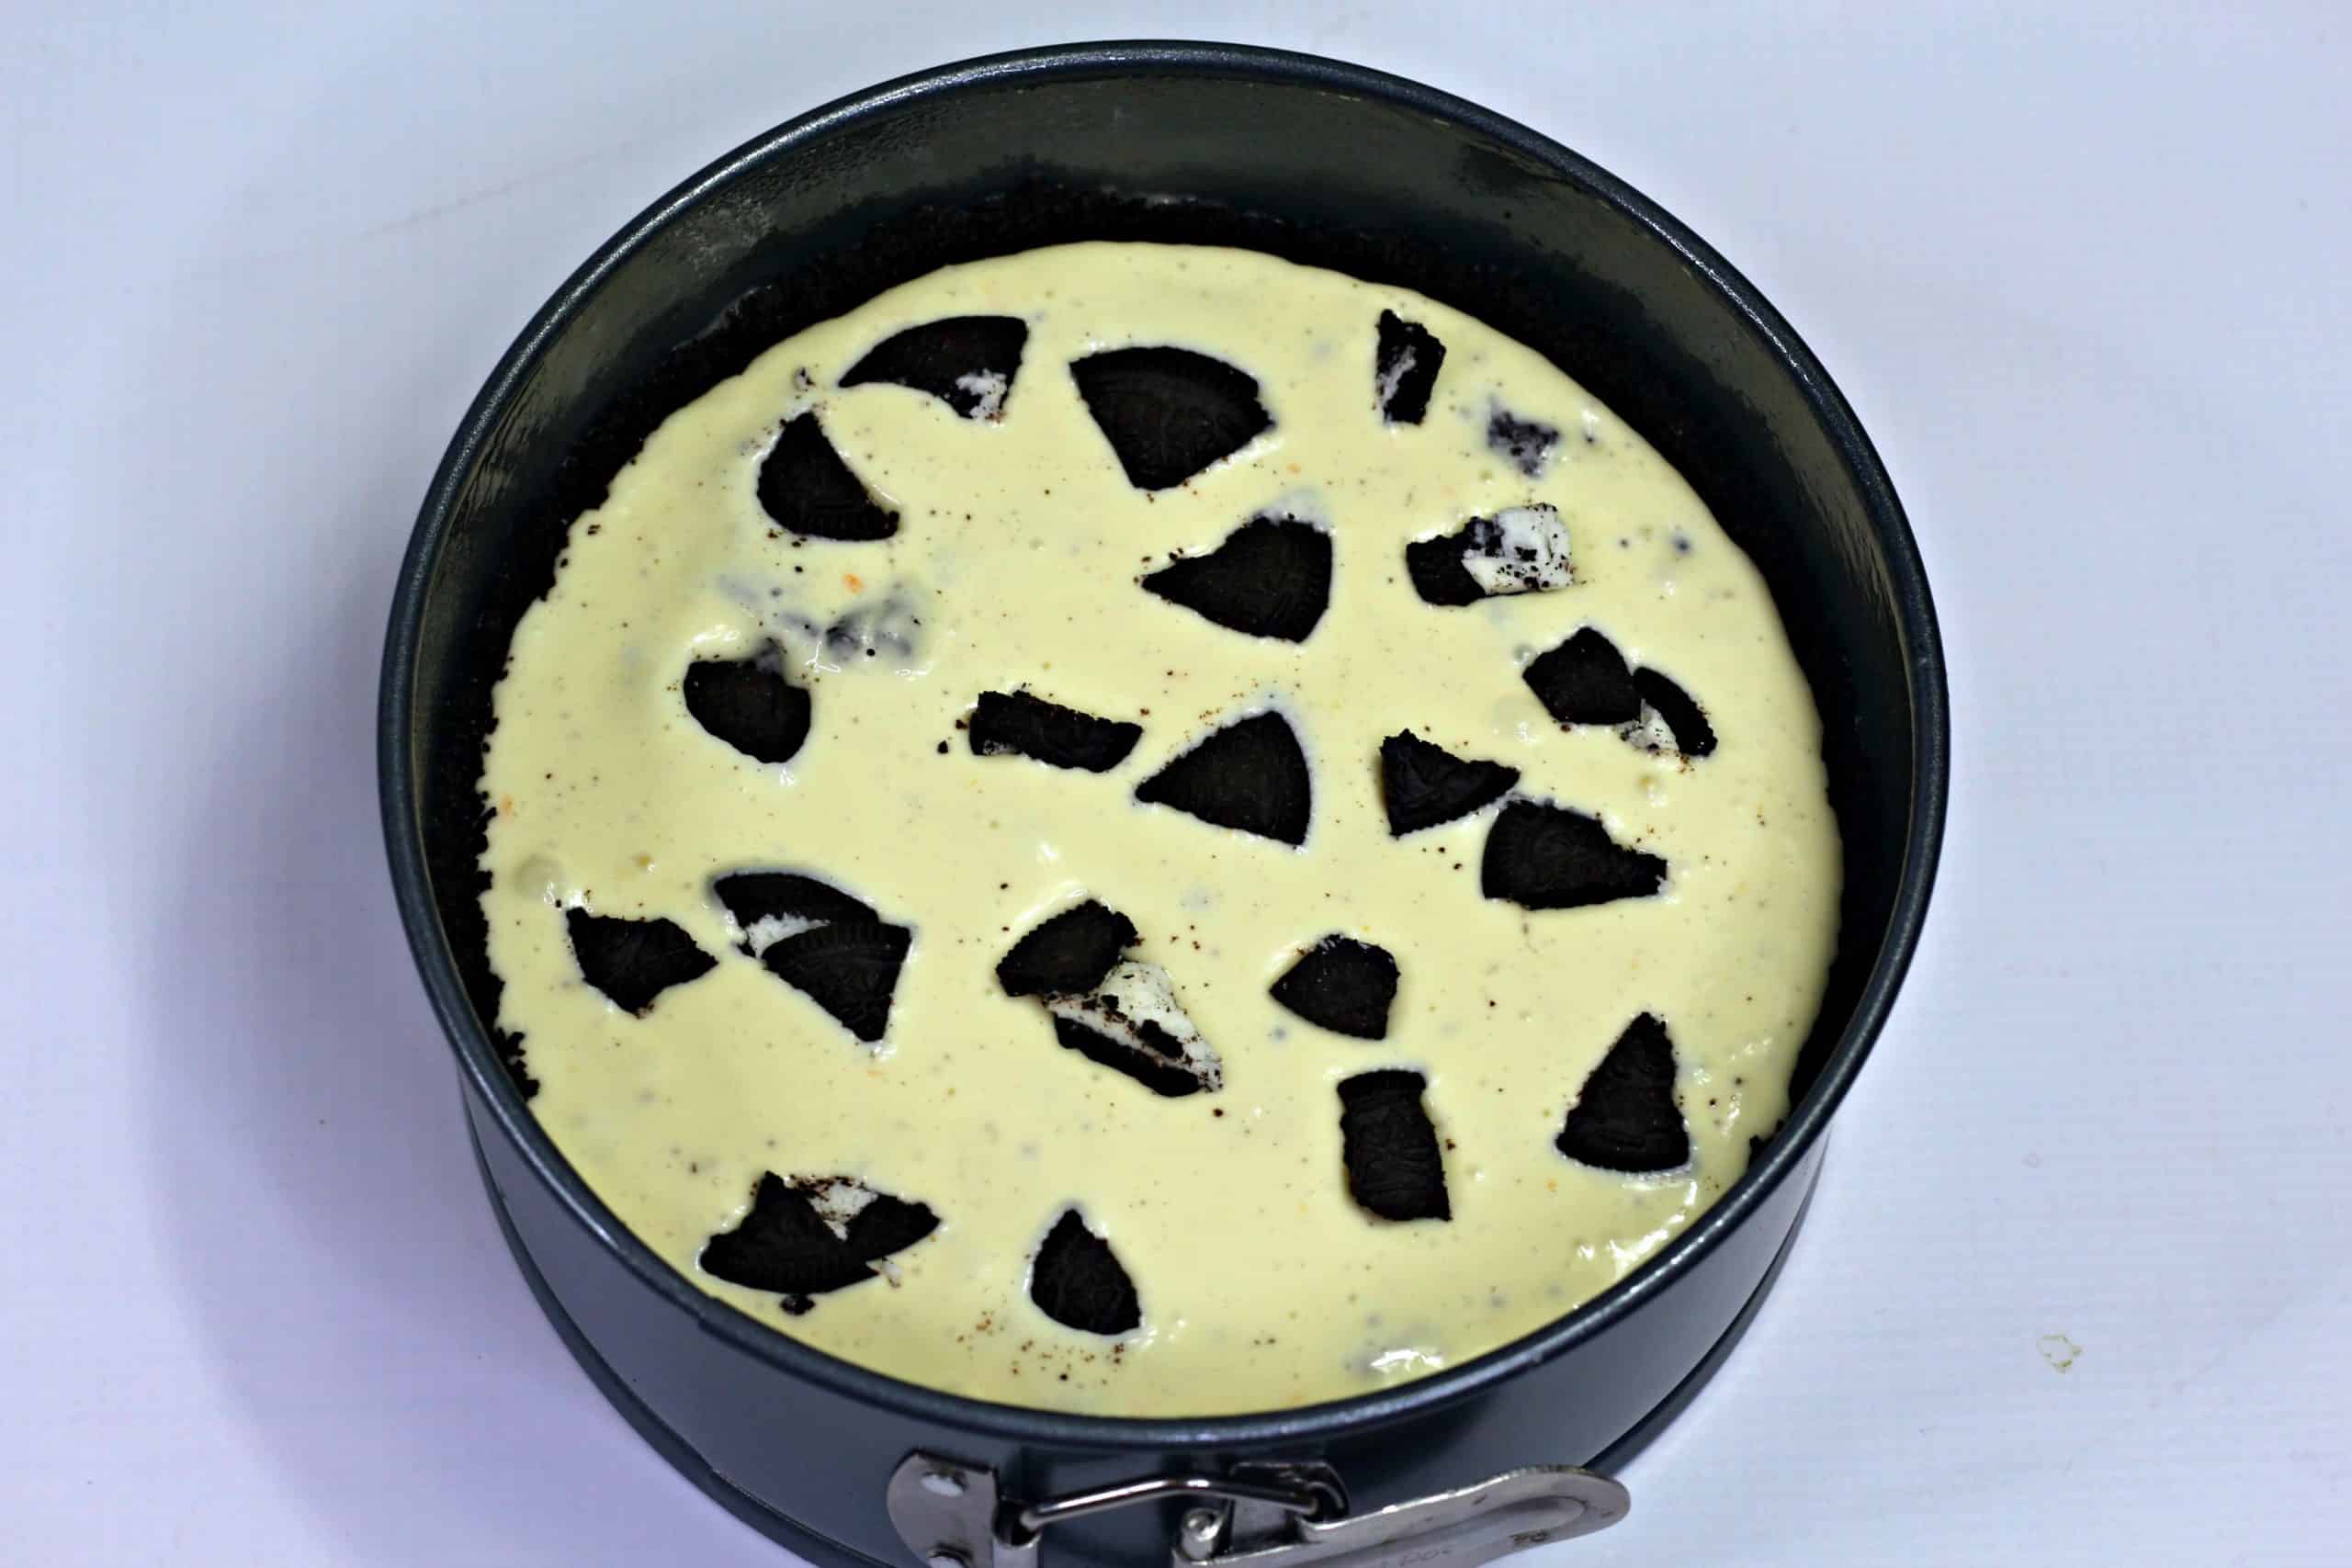
- Slowly begin to add in the chopped cookies. Stir to mix.
- Transfer the crust from the refrigerator. Slowly begin to pour the cheesecake batter into the prepped pan.
Cooking Directions
- Put the metal trivet into the Instant Pot.
- Add 1 1/2 cups of water. Gently place the cheesecake pan on top of the trivet. Cover the pan that has the cheesecake with foil.
- Set on manual setting. Adjust the pressure to high. Cook for 30 minutes.
- 30 minutes will make the cheesecake creamy while 35 minutes will result in a denser cheesecake.
- When the IP beeps, release the pressure naturally for about 20-30 minutes.
- Carefully open the IP. Gently move the cheesecake to a cooling rack.
- Allow to cool for about 1 hour. Carefully run a paring knife around the edges of the cheesecake.
- Transfer the cheesecake (still in the springform pan) to the refrigerator for at least 6 hours or overnight.
Ganache Directions
- Pour the heavy cream in a microwave safe bowl. Put the bowl in the microwave for 45 seconds. (Or until it begins to bubble.)
- Put the chocolate chips into a bowl. Pour the hot heavy cream on top of the chocolate chips. Check to make sure all of the chips are covered with the heavy cream. Set the bowl aside for about 1 minute.
- After the minute start to slowly stir the mixture until all is totally blended. (If not all of the chips are melted return the bowl for another 20 seconds.)
- Stir. Repeat these last 2 steps as necessary until the chips are melted and incorporated. (If the mixture is too thin add move chips, If the mixture is too thick add more cream. If added stir until all ingredients are blended.)
- Move the serving plate close to the cheesecake. Remove the cheesecake from the pan. Set it on the serving plate.
- Carefully pour the ganache over the cheesecake.
- Oreo Whipped Cream
- Using a hand beater, beat together all ingredients until combined and stiff with peaks
- Scoop into a piping bag
- Garnish with Oreo cookies.
- Set the cheesecake aside allowing the ganache to harden before cutting and serving.
- Return the leftover cheesecake to the refrigerator. Cover the cheesecake loosely with foil. It will last in the refrigerator for about 1 week.