


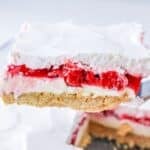
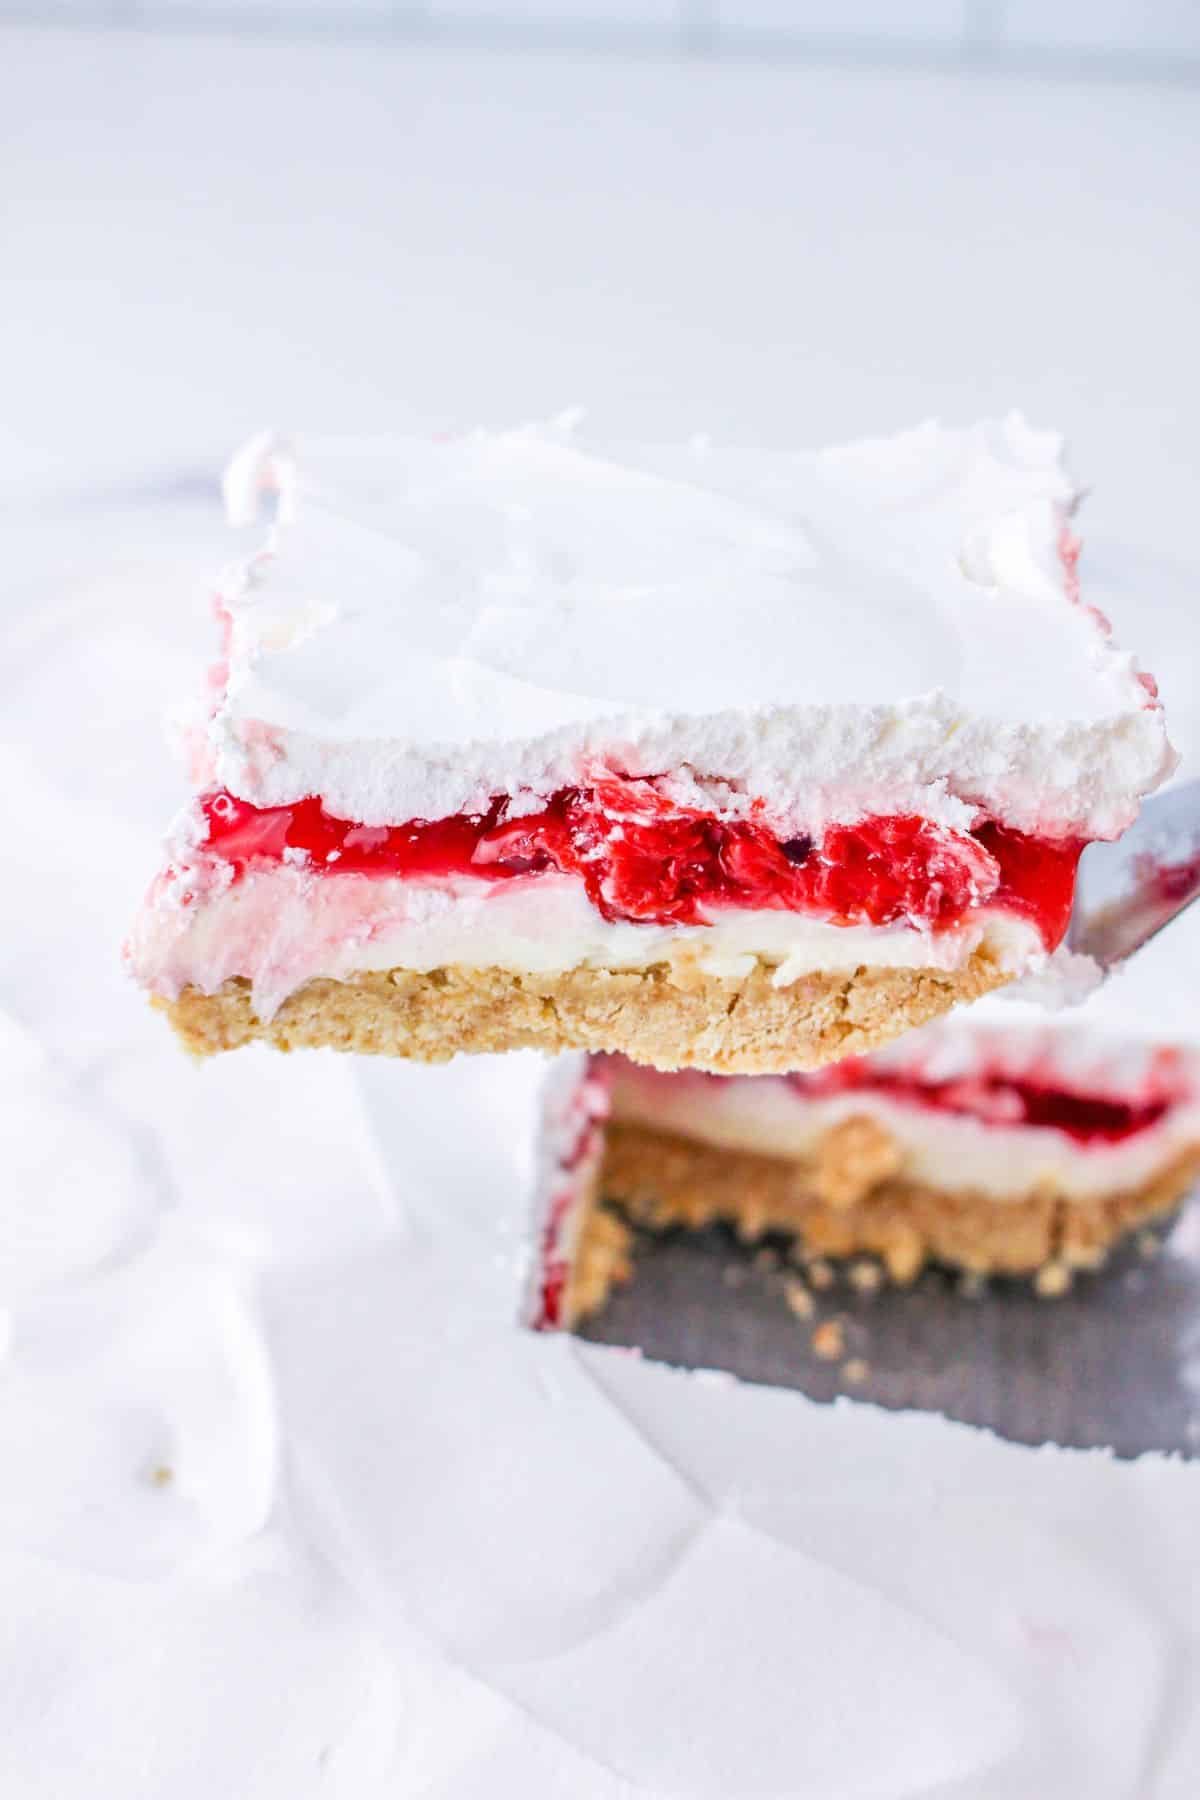
Looking for the perfect no-bake dessert? Try out this cherry cheesecake lush dessert. Layers of flavor start with a vanilla wafer crust, cream cheese layer, and cherry filling layer, and finish with a Cool Whip layer. A delicious alternative to a classic cheesecake recipe. Give this layer dessert a try this week.


This creamy goodness of a lush dessert is perfect all year round. From a summer cookout to a holiday celebration with your friends and family. A dreamy dessert that takes no time to whip up. The hardest part is waiting for it to set up, to slice and devour.
This was inspired by my lemon lush dessert. I wanted to create a cherry dessert that had sweet flavors like the lemon version but with a twist.
Jump to:
Ingredients
This is a quick overview of the ingredients that you will need to make this recipe. You can find the full list in the recipe card at the bottom of the post.
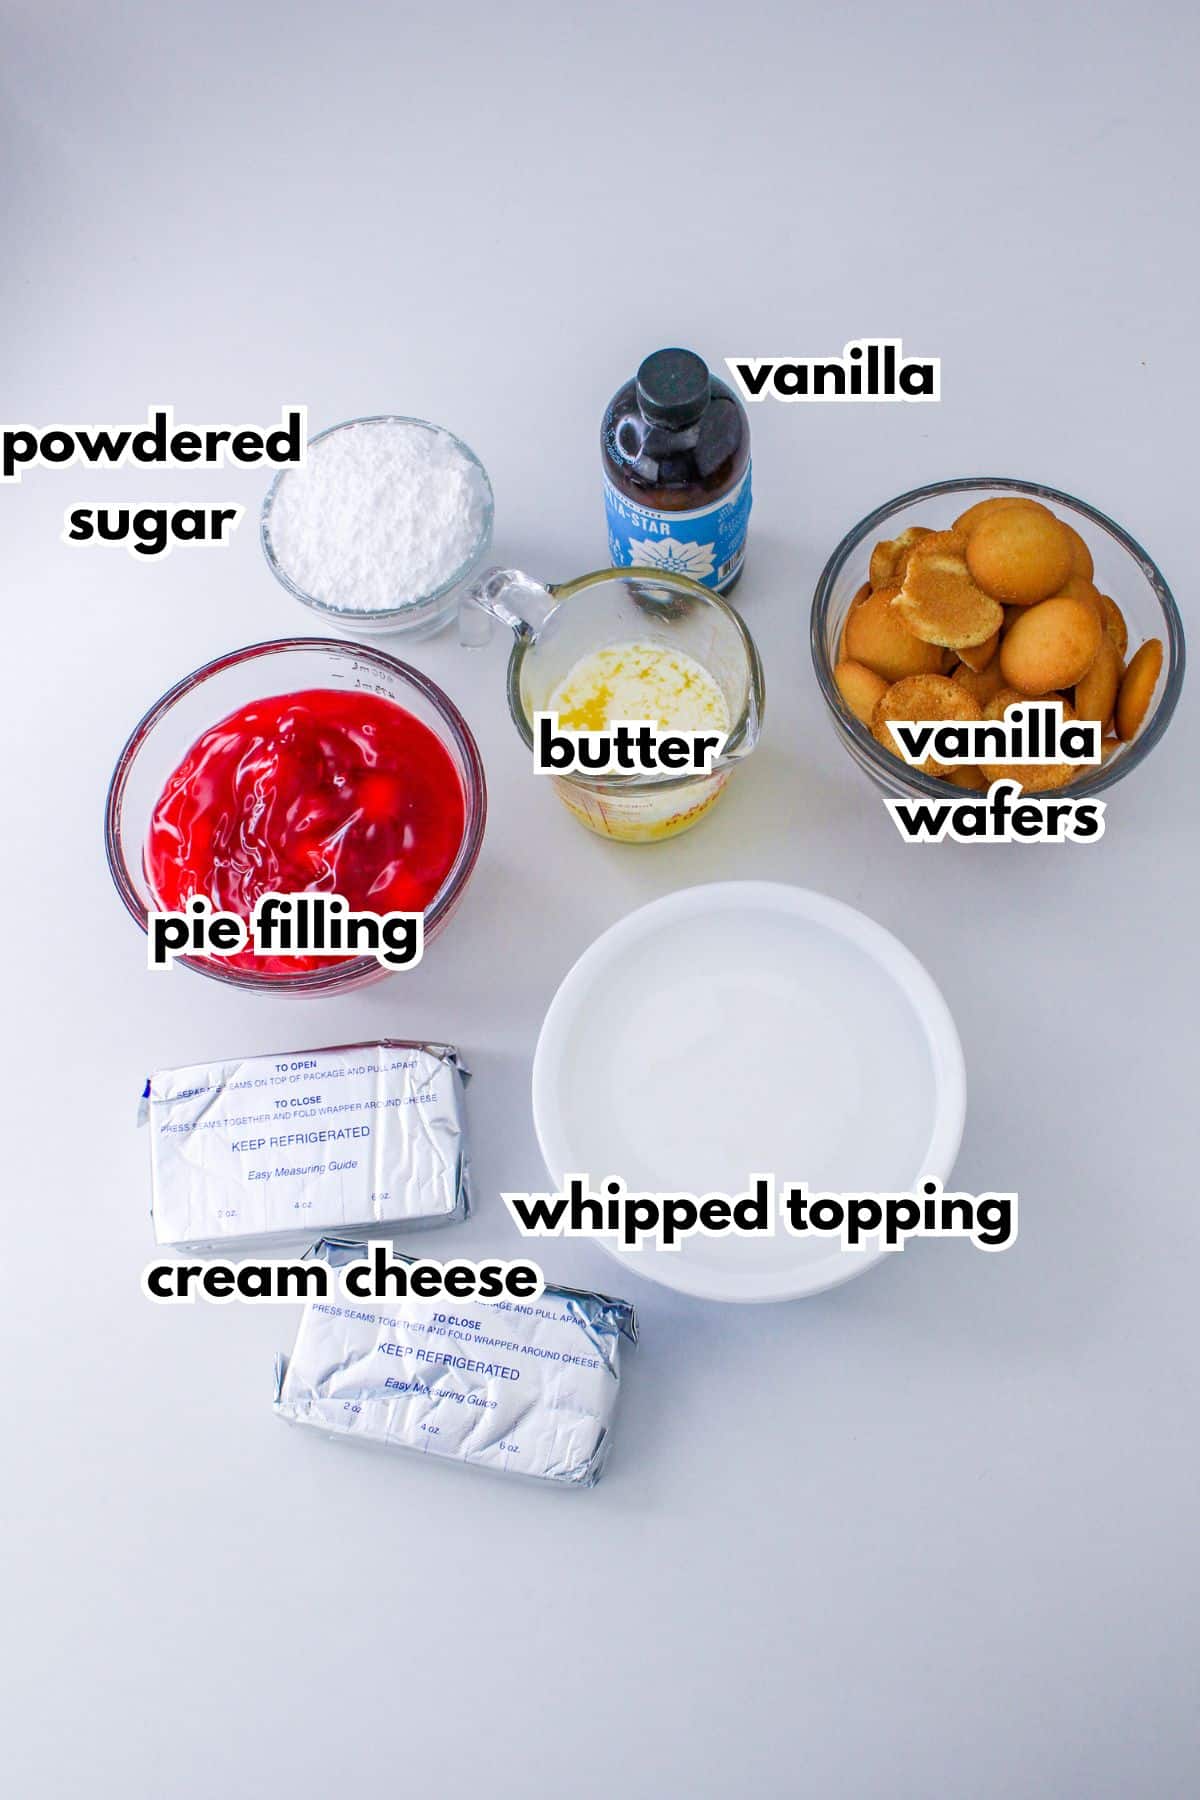
- vanilla wafer cookies
- unsalted butter
- cream cheese
- powder sugar
- vanilla extract
- whipped topping (Cool Whip)
- cherry pie filling
Instructions
This is a quick overview of the instructions to make this recipe. You can find the full steps in the recipe card.

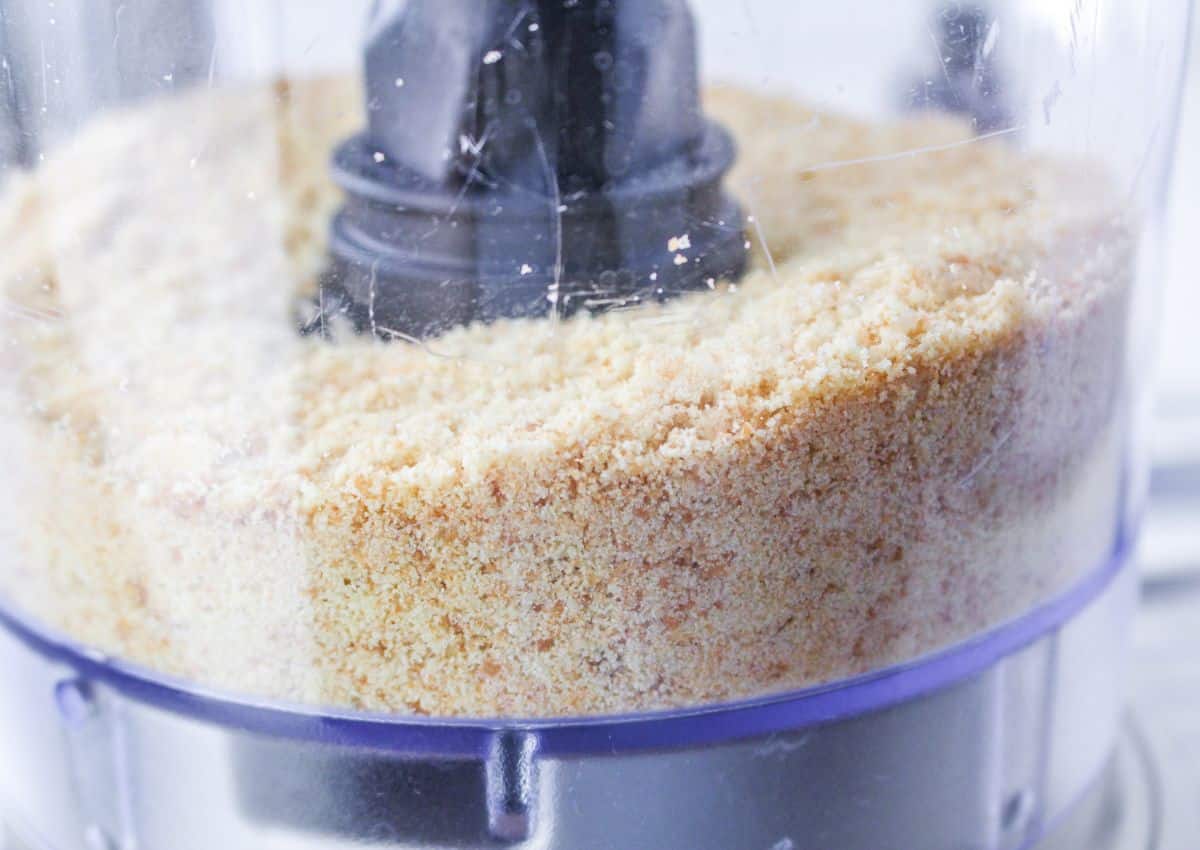
In a food processor, you are going to add your cookies and pulse until a fine crumble.
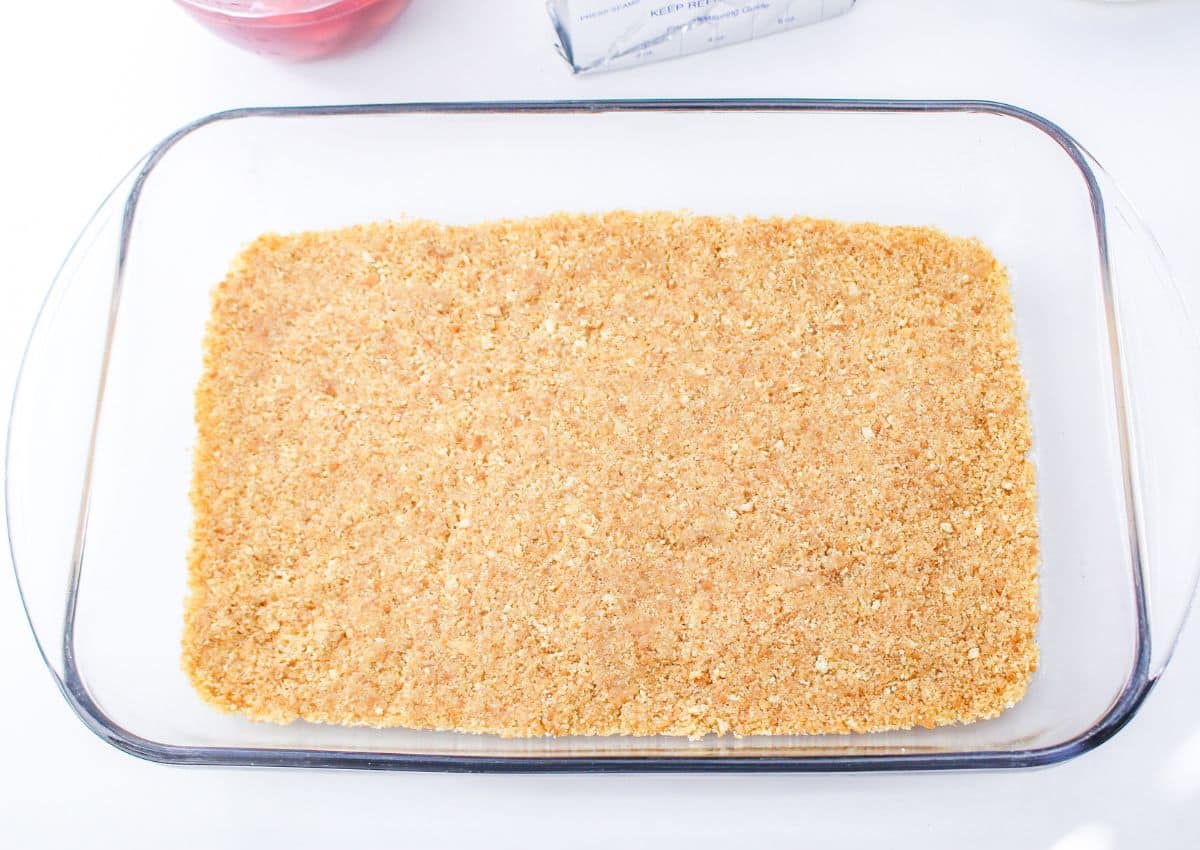
Next pulse in the melted butter. You want it to be a sand-like texture. Press the mixture into the pan making sure the crust is firmly packed in the pan.
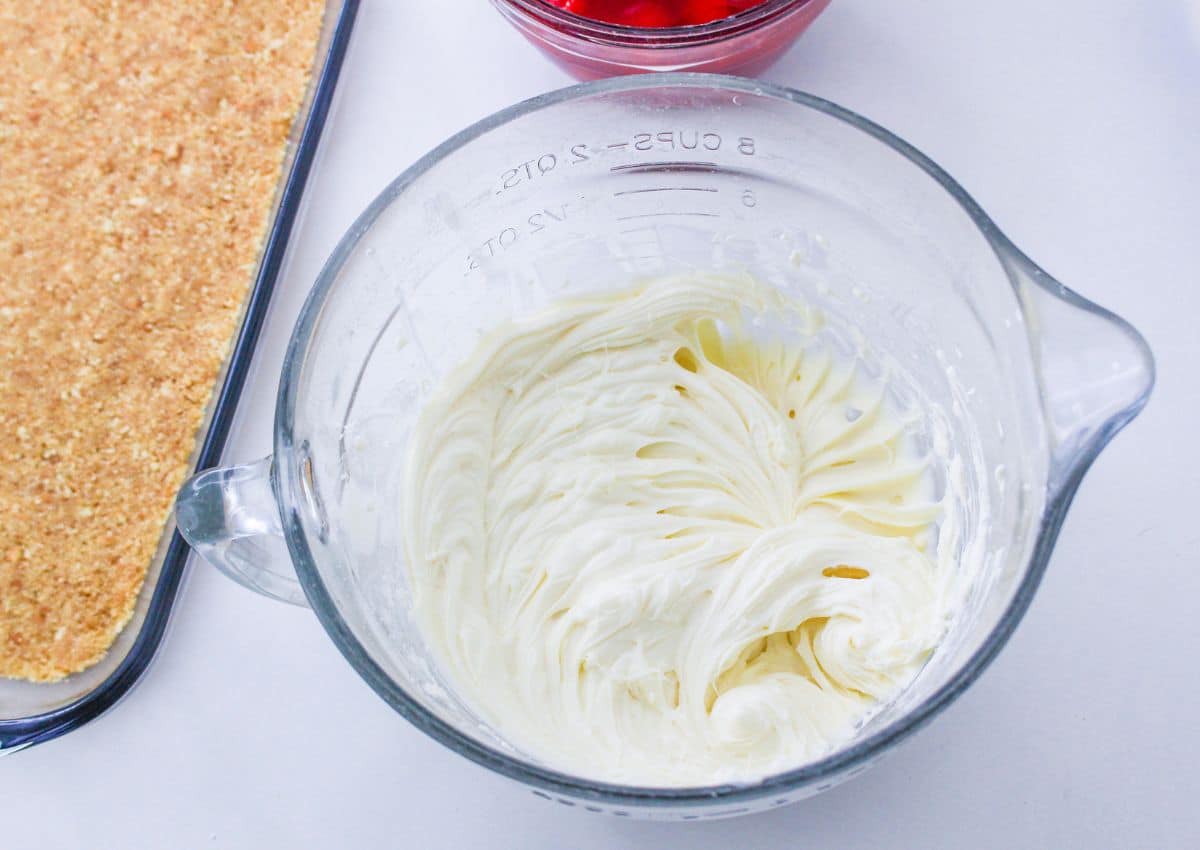
In a bowl of a stand mixer beat the cream cheese until fluffy. Add in the powdered sugar and vanilla and beat to combine. Gently fold in half of the whipped cream. You can also use a hand mixer for this step.
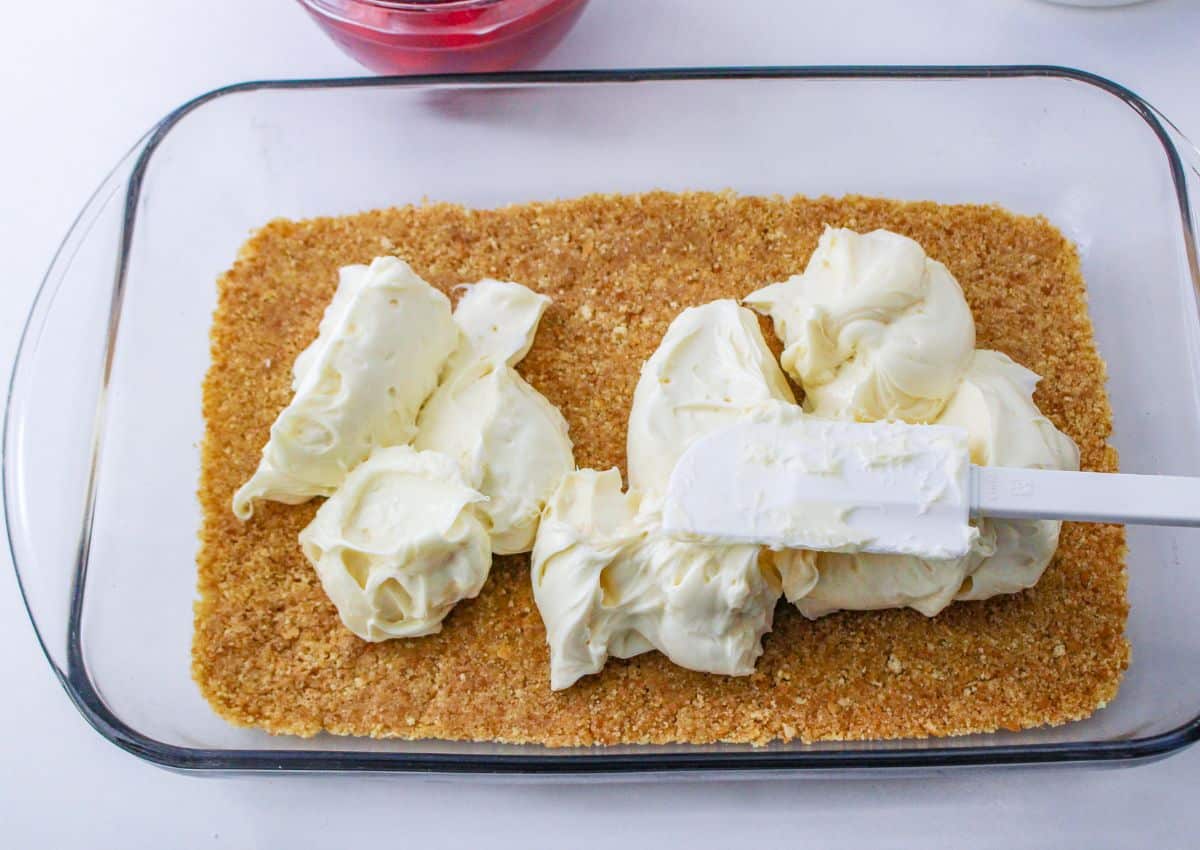
Spread the filling in the pan.
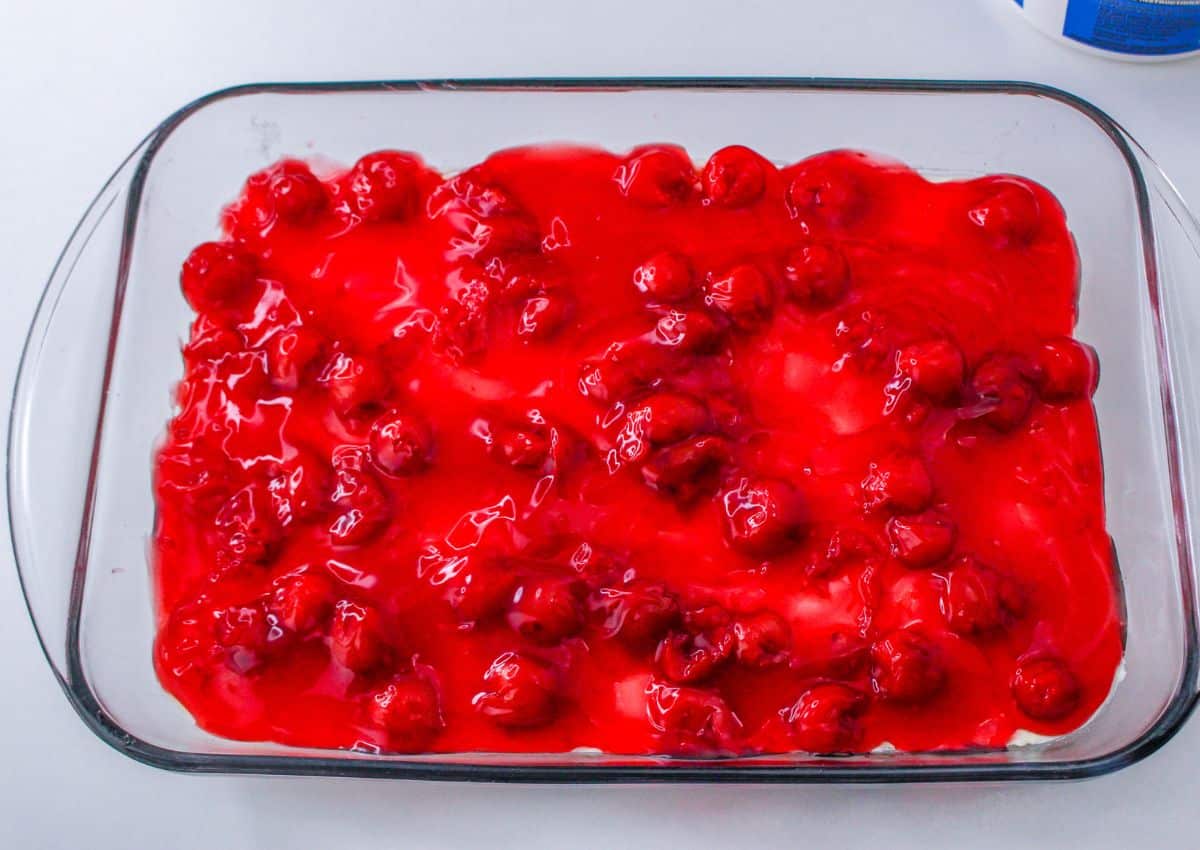
Then add the cherry pie filling over the cream cheese layer.
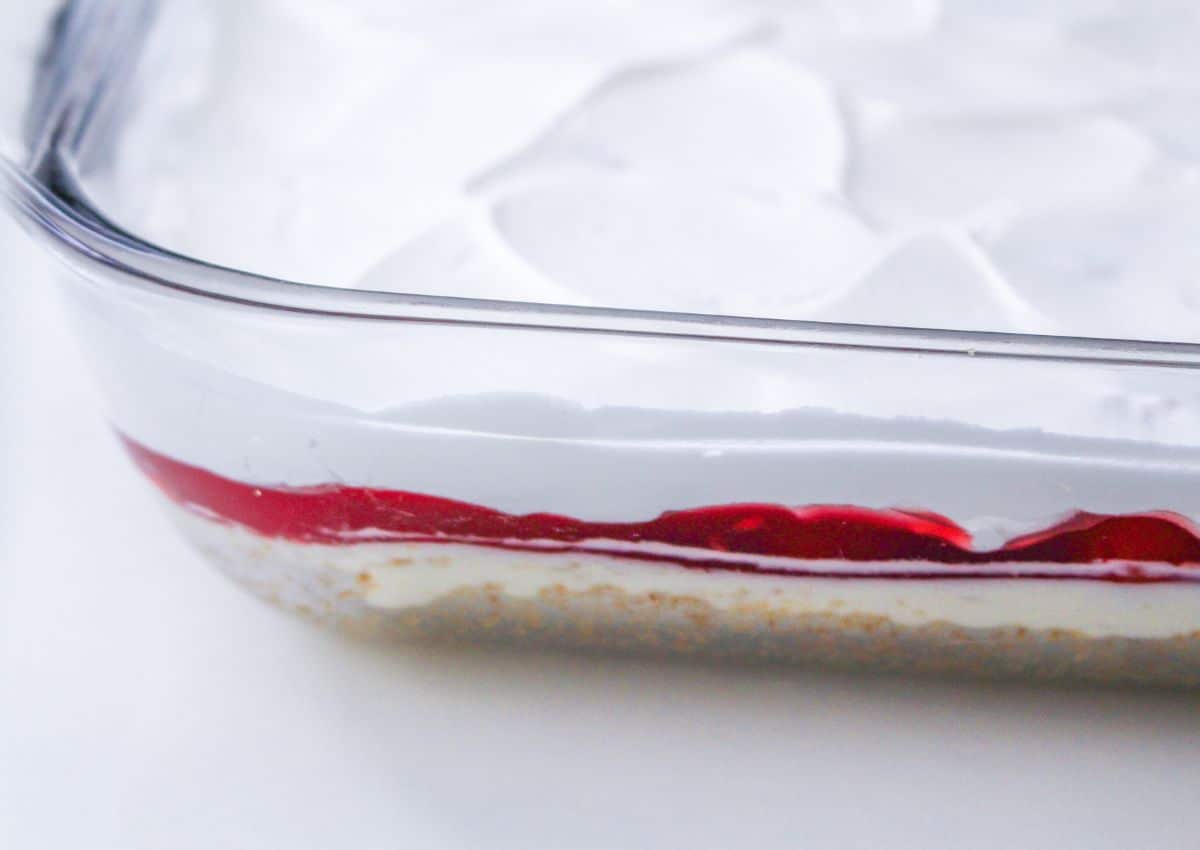
Top with the remaining Cool Whip. Then cover and place in the fridge to allow the dessert to set up.
Hint: Make sure your cream cheese is softened. Leave the cream cheese in the foil packet and place in a bowl with warm NOT hot water. Let it sit for 5 minutes and then drain water and repeat until you have softened cream cheese, if you forgot to set out at room temperature to warm up. Softened cream cheese will give this dessert a velvety texture for the creamy cheesecake layer.
Variations
Here are a few simple ways to change up this cherry lush no bake recipe to create a bit of a different end result.
- Crust – You can use graham cracker crust, crushed vanilla sandwich cookies, ginger snaps, or even Oreo cookies for the crust. Each of these will transform the flavor of this dessert. I love the nilla crust but experiment if you want.
- Pie Filling – Any flavor of pie filling will work. Or you can make a homemade cherry pie filling if you don’t want to buy a can. But blueberry, strawberry, peach, and more are all great swaps and offer a fun twist of flavor.
- Nuts – Add some slivered almonds or pecans on top of the Cool Whip layer or even on top of the sweet cherries. It will add a nice crunch factor to the dessert.
Give my cherry cinnamon cookies a try for another great cherry dessert recipe!
Equipment
You will want to use a baking dish, 9×13 size. This is the perfect dessert recipe that will feed a crowd. If you decide to double the recipe then you would want to use two pans. As a sheet pan will be a bit too thin for the layers.
I also used a stand mixer for this, but you can use a whisk and spatula to mix it up. I just find an electric mixer helps create the perfect texture of the cream cheese filling.
Storage
Store the dessert in an airtight container or covered with aluminum foil in the fridge for up to 4-5 days. This lush dessert recipe will last for a few days in the fridge, but after that, it begins to separate just a bit. You can make it a day ahead of when you plan to serve it up.
In terms of freezing, I have not tried to freeze this lush recipe. But I have frozen no bake cheesecake and it worked just fine. You could place it in a freezer container and freeze it for 1-2 months. Then thaw in the fridge overnight before you plan to eat.
Wendy’s Test Kitchen Tips
- Make sure to firmly pack the crust into the pan. That way when you slice and remove it, the crust holds its shape and doesn’t crumble apart.
- Use a light hand when you are spreading on the layers of this dessert. It is going to ensure you get that nice even layer that you can see when you slice. If you press too hard the layers will blend.
- This easy dessert can be made a day in advance if you would like. Just ensure it is covered with a lid or plastic wrap and stored in the fridge until you are ready to serve.
- You can place cookies in a bag and use a rolling pin to crush them up into a fine crumble if you do not own a food processor.
- It is very important to let your dessert fully cool and get nice and chilled. It will help set up the cream cheese layer so that when you slice it doesn’t fall on the plate.
FAQs
Yes, you can use fresh cherries instead of a pie filling. Just remove the pits, then spread the cherries over the top of the cream cheese, and top with the whipped cream layer.
If you are worried about the crust getting soggy, you can place the crust in the pan in the fridge while you work on the cheesecake layer. This will ensure the crust firms up more and will keep it firm.
The crust of this recipe uses gluten cookies. Just reach for a gluten-free crust option and it can become a gluten-free dessert option for you.
Related
Looking for other recipes like this? Try these:


Pairing
These are my favorite dishes to serve with Cherry Cheesecake Lush Recipe:


I hope you’ll like this recipe, and please, if you make this recipe, snap a pic and hashtag it #mamasonabudget— I love to see your creations on Instagram, Facebook, and Twitter!
If you love this recipe, please leave a ⭐⭐⭐⭐⭐ rating! Thank you.

Cherry Cheesecake Lush Dessert
Equipment
- food processor
- 9×13 inch baking dish
- mixing bowls
- electric mixer – hand or stand mixer
- Rubber Spatula
- plastic wrap
Ingredients
- 11 ounces vanilla wafers
- ½ cup unsalted butter melted
- 16 ounces cream cheese softened
- 1 cup powdered sugar
- 2 teaspoons vanilla extract
- 8 ounces whipped topping like Cool Whip
- 21 ounces cherry pie filling
Instructions
- In a food processor, pulse the vanilla wafers until they are crumbs. Add the melted butter and pulse until well combined.
- Press the mixture into the bottom of a 9×13-inch baking dish to form the crust. Refrigerate while preparing the filling.
- Using a hand mixer or a stand mixer, beat the softened cream cheese until smooth. Add powdered sugar and vanilla extract, and beat until well combined and creamy.
- Fold in half of the whipped topping into the cream cheese mixture gently until fully incorporated. Spread the cream cheese mixture evenly over the chilled crust.
- Spread the cherry pie filling over the cream cheese layer. Then, spread the remaining whipped topping over the cherry layer.
- Refrigerate the Cherry Cheesecake Lush for at least 2 hours, or until set.
- Cut into squares and serve chilled.